Showing posts with label glory quilt. Show all posts

Firework Quilt Tutorial

Saturday, July 1, 2023

Happy July friends!
Today I'm sharing another red, white, and blue quilt with you.
I just can't get enough of this summery, patriotic color combo!


I've been wanting to do something with the
 triangle cutoffs from my Glory quilt for a while now. 


So I used them to make 
3" finished Hourglass blocks.


And paired them with some coordinating 
solid squares that I cut from my stash.


I used 97 Hourglass blocks and 98 solid squares in this quilt.
I did a 13 x 15 layout so the finished size is 39-1/2" x 45 1/2".  
A nice baby-size quilt!  Are there any 4th of July babies out there?!?
I know a couple...


I had the backing fabric (leftover from another quilt back)
+ the binding fabric in my stash so I didn't buy anything
specifically for this project.  That always feels so good!


Jen Ostler in Highland, Utah quilted it for me.
She always quilts in an extra little motif for the
recipient to find; this time it was a heart.  So cute!
The panto Jen used is called Groovy Stars by Melissa Kelley.


If you want to make this baby-size quilt but don't have cutoffs 
from the Glory quilt, you will need:

Approximately 2-1/2 yards of red/blue scraps
1-1/2 yards of white fabric
1-1/2 yards of backing fabric
1/2 yard of binding fabric (cut five 2-1/2" x 40" strips)

To make (2) 3" finished Hourglass blocks, cut:
(1) red/blue 4-1/2" square and 
(1) white 4-1/2" square to make 

Here's a quick little step-by-step tutorial 
on how to make Hourglass blocks:

Step 1: Place (1) red/blue 4-1/2" square and (1) white 4-1/2" square on top of each other,
right sides together.  Mark a diagonal line on the top (white) square
going from corner to corner in both directions.  Sew 1/4" away
from one of those diagonal lines on both sides of the marked line.


Step 2: Cut through the squares on
both of the marked diagonal lines.


3.  Press the seam allowances toward the red/blue triangles
and then mix and match the units so two red/blue
triangles are opposite each other.  Sew the units together 
along the long edges (nesting the seams) to make
2 Hourglass blocks.


Step 4. Trim each block to 3-1/2".
(The center point of the block should be
the 1-3/4" mark on your ruler.)


Of course, you can make a 
Firework quilt as big or as small as you want.
Make as many Hourglass blocks as you need
for your desired quilt size.  

Click HERE if you want a Firework Quilt Coloring Sheet.
(There are extra squares on it if you want to make a bigger quilt!)


Also, if you're looking for more red, white, and blue
inspiration - check out THIS post featuring all 
the red, white, and blue quilts I've ever made!

What fun plans do you have in July?
We're going to Bear Lake at the end of the month.  Can't wait!

I hope you enjoyed this tutorial today.
Let me know if you have any questions and happy quilting!

My Red, White, and Blue Quilts

Tuesday, June 6, 2023

Hey friend.  I've been meaning to share with you all of my 
red, white, and blue quilts - together in one place.  
Hopefully, if you're wanting to make a
patriotic quilt, you'll find some inspiration here!


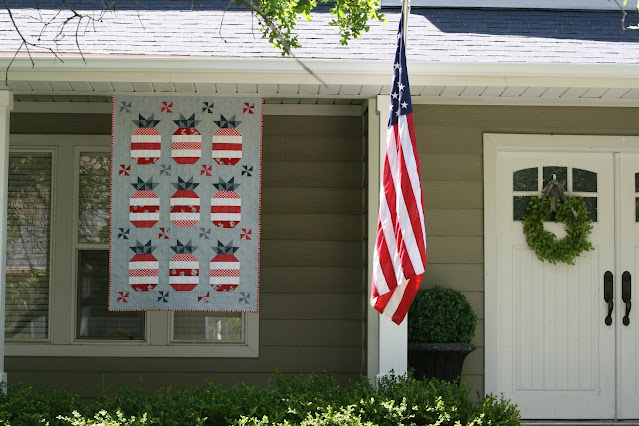
First up is my Star-Spangled Pineapples quilt.
This is a free pattern that Amanda Niederhauser (@jedicraftgirl) 
and I created for our Five Fat Quarter Fun series a few years ago.


HERE is a link to the free PDF pattern and
HERE is a link to the original blog post with more photos and details.


Next up are my beachy, faded Stars and Stripes quilt
and my No-Point Stars quilt.


Both of these patterns are by other quilt pattern designers.
Stars and Stripes is by Camille Roskelly of Thimbleblossoms and it's available
in her shop HERE.  The No-Point Stars pattern is a free tutorial by
Allison Harris of Cluck, Cluck, Sew.  You can find it HERE.
I don't have blog posts up yet about my versions.
I want to share more details so I'll do that soon in another, separate post.

Another red, white, and blue quilt that I made
many years ago is my Scrap Jar Stars quilt.


This is a great stash-buster project!
This pattern comes with instructions for 4 different size quilts
and is available in my Etsy shop HERE.

I've also made my United quilt in 2 different color ways.  


It has 50 really simple flag blocks (to represent the 50 states) 
plus 5 stars and a heart block!  It's a fun make and very beginner-friendly!
United finishes at 78-1/2" x 87-1/2".
You can find the pattern in my Etsy shop HERE and
HERE'S a blog post with all the details about the navy one.
And you can see the low volume one HERE.

If you're looking for a really simple star/flag quilt
check out my Glory quilt HERE.
I share a free cutting chart & tutorial for Sawtooth
Star block sizes 3" - 20" plus all the details for this quilt.


Another option is a red, white, and blue Star Patch quilt!
I've made 3 Star Patch quilts (a colorful one, a red and white one,
and this one).  It was just screaming to be made up in 
red, white, and blue don't you think!?!


And for all you scrap lovers out there, I've got a tutorial
for this Firework quilt.  I made a baby-size but it
would be really easy to make it bigger.  A coloring sheet is included.


And if you're in the mood for some simple patchwork,
I've got this red, white, and blue Rough and Tumble quilt pattern.
It comes with instructions for 5 different quilt sizes and is great for beginners!


I think it would be cute to layer any patriotic quilts
with a simple red or blue quilt (like the ones that I made for my new book,
Quilt the Rainbow).

[Sew Delightful.  Photo courtesy of Martingale.]

[Patchwork Plaid.  Photo courtesy of Martingale.]

You can find both of those patterns in Quilt the Rainbow; available HERE.

I recently finished this


This is a 2-1/2" x 42" strip-friendly pattern with 2 size options.
Click HERE for the paper pattern or HERE for the PDF.


I feel like you can never have too many red, white, and blue quilts!
Do you have a favorite of the quilts I shared today?

I hope you found some inspiration here!
Happy Summer friends!

Glory Quilt

Thursday, August 11, 2022

 If you've been following along with me
on Instagram you may have seen a simple
star/flag quilt I made in July.  I finally got it bound and
photographed so I want to share the details
with you today.


In June of this year, I took a trip to McCall, ID, and happened 
upon a really incredible quilt shop called,
J. Beck Home.  I was inspired by the red, white, and blue
fabrics and vintage quilts there and ended up
buying most of the above fabrics.  I had something like this
design floating around in my head for what to do with them:


I used instructions from my recently published
Sawtooth Star Cutting Chart to make the stars.
It includes cutting instructions for block
sizes 3" - 20".  Click HERE to check it out.
I made 12" finished stars for this project.


I was a little nervous that this pattern was going to be too simple
but when it was all said and done, I loved it!


The background fabric I used is a light gray/puddy color
called Celestial by Art Gallery Fabrics.
The backing fabric I used is from the Watermark collection
by Tammy Green for Riley Blake Designs.
The binding fabric is Stripes C495 by
Riley Blake Designs.


I had my quilter, Jen Ostler in Highland, UT.
quilt it for me with a 3/4" grid.  I've had that size grid done before
and loved it.  I don't think it makes the quilt too stiff
and it's just so pretty!


She quilted her signature "hidden object" in one of the
squares -  the tiniest little star!  I just love it!


The labels are from Everemblem.
I get the 2" cotton, fold-over, sew-in labels.
If you go to their site, you'll have to pick a cotton label 
and customize it from there.  I've loved the ease of these labels.
Now I don't have an excuse to not label my quilts!


My quilt finished at 63" x 93"
(so about the size of an XL twin
commercial size comforter).


I turned it sideways on my king-size bed
and it makes for a really nice coverlet!


I wasn't planning on doing a pattern
or full tutorial for this quilt but I know 
some of you want to make something similar
so here are a few more details:

Make 12" finished stars using my Sawtooth Stars Cutting Chart.
(There's a tutorial on that blog post for how to make the stars.)
Sashing and borders - cut 3-1/2" wide strips.
Binding - cut (9) 2-1/2" wide strips.

FABRIC REQUIREMENTS
Red stars: (18) 1/4 yard prints
Blue Stars: (6) 1/4 yard prints
Background: 4-3/4 yards
Backing: 5-2/3 yards
Binding:  2/3 yards 
Batting: 71" x 101"


Apparently, there was a right and wrong side to the
Celestial solid fabric I used for the background.
I didn't notice until I took the above picture.


I hope you found inspiration here today!
Thank you to @imacoffeemom on 
Instagram for helping me name this quilt.
If you decide to make something similar to this
I'd love to see it on Instagram.
Tag me @gigis_thimble and use the hashtags
#gigisthimblepattern and #gloryquilt.