Showing posts with label recipes. Show all posts

Wisconsin Cranberry Pie

Monday, December 9, 2019

Well, I'm no food blogger but a few of you asked for this recipe after Thanksgiving so here it is!

I got this recipe from my sister many years ago but have been unable to find the 
original source so if anyone recognizes it please let me know!

Wisconsin Cranberry Pie


Ingredients:
1 unbaked 9” pie shell
3 c. halved cranberries
½ c. water
1 ¾ c. sugar
5 Tbsp. flour
¼ tsp. salt
½ tsp. almond extract
2 Tbsp. unsalted butter

Topping: 
¹∕3 c. unsalted butter, melted
¾ c. flour
¾ c. sugar


Directions:
1. In a medium saucepan add cranberries and water and bring to a boil.  Mix the dry ingredients and slowly add to the cranberry mixture.  Cook on low heat until thick.  Remove from heat and add extract.

2. Cool completely.  Pour into the unbaked pie shell.  Dot with butter.


3.  Mix topping ingredients together with a fork and sprinkle over the filling.


4. Bake at 425° for 35-40 minutes or until light golden brown.


5. Serve at room temperature or cold with ice cream or whipped cream.  Enjoy!

Click HERE for the printable version of this recipe.
You can also check out some of my other favorite recipes HERE
There's some oldies but goodies there!


Thanks for stopping by today!

A Happy Weekend

Monday, October 7, 2013

Man.  This little guy melts my heart.  Except he's not so little anymore.  11 years ago, yesterday, he made me a new momma.  I waited four years for God to give him to me.  A long, emotional four years.  But in retrospect, God knew what he was doing in his perfect, my-timing-is-not-your-timing kind of way.  He needed me to wait, to prepare, to learn and grow.  To depend on Him more.  To grow closer to my husband.  And when it was time, he arrived.  A 7 lbs. 1 oz. healthy, blonde baby boy.  This little guy is super smart, crazy good on the soccer field, so sweet, thoughtful, funny and well like I said, he just kind of melts my heart.  And did I say sweet?  Yeah, he's super sweet too.  I'm so thankful for him and thankful to God for giving him to me.
We celebrated with a dang good, Hot Chocolate Bundt Cake - recipe from the blog, Cookies and Cups.  My little guy loves anything with marshmallows in it (like he can eat half a bag of jumbo marshmallows at any given time) so I knew he'd love this cake.  It had GREAT flavor and it's now my official "go-to" chocolate cake recipe.  Yum.

Hot Chocolate Bundt Cake | Cookies and Cups


In between birthday festivities and watching LDS General Conference I snuck in a little "me" time :)  It felt like I was preparing a football fields length of binding but in all actuality it was only half that amount - about 60 yards.


  I like binding but I have a feeling this might take a while.


 What about you?  Did you have a good weekend?  I sure hope so!


~ Amber

This and That

Friday, July 19, 2013

 Well.  It's been a birthday week for this little girl. 


Needless to say, it's been a busy one.
We spent some time with her and 6 little cuties at a local water park.


Does this give you an indication of the spunky little girl we're raising?


 I'm not sure where she gets it from...


Anyways.  That night we enjoyed this three layer Vanilla Bean Cake with Sprinkles made by yours truly.  And, it was quite delicious if I do say so myself!  I first spied a picture of it on Pinterest (of course it was much prettier than mine.  But I tried).  I love the fact that I put one of my "pins" to good use though!  Do you use your pins?


* I'm also loving the new Rhonna Farrer iphone photo editing app if you can't tell.  I'm having a ball with it on Instagram right now (like I need one more thing sucking me in)!  I'd love to be friends with you on Instagram!  Look me up!  My username is gigisthimble.


Through all the birthday festivities I did manage to make another Farmer's Wife Block.  I know.  It's a miracle. 
Here she is, #78 Shooting Star:


It's not perfect but I had fun.  It's been so long since I've worked on my Farmer's Wife Blocks.  I'm trying to get back to them!  Slowly but surely I will get this thing done! 

Shooting Star was paper pieced.  
(And for those of you who have been trying to get into the Yahoo group that supplies the paper piecing patterns for all the blocks ~ I am sorry if you haven't gotten a response!  I've tried contacting the group administrator too and haven't heard back.  Not sure what's going on there.  All I can say is keep on trying I guess.)


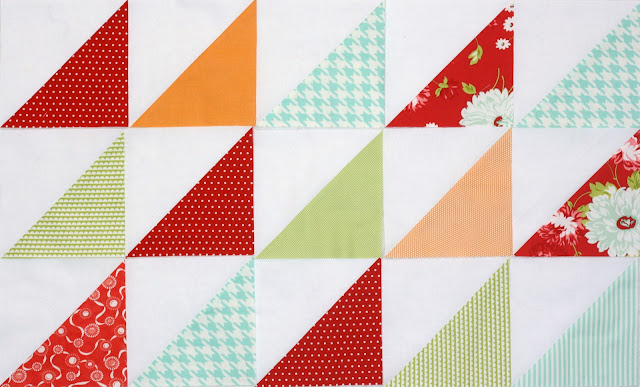
I've also taken a cue from Camille (who suggested cutting quilt leftovers into 2 1/2" strips for a scrappy binding roll).  I'll piece the Scrumptious strips together when I get a minute.  I might possibly use them to bind this soon to be baby quilt: 

[HST's = 6-1/2" unfinished]

I also got a fun surprise package in the mail the other day.  Those ladies at Moda sure know how to make a girl happy!


L to R: Sweet Serenade by Basic Grey, Wrens and Friends by Gina Martin and  Family Tree by Deb Strain.  I can't wait to play with them!

I hope you've had a fun and productive week too.
Happy weekend!

~ Amber

Bon Bons

Wednesday, December 12, 2012

 I made these the other night for my recipe group.  
I'd forgotten how good they are...


 They're really easy.  Just a little time consuming.  
I've been snacking on them for days (not good).  
I suggest quickly giving them away to friends and neighbors!


So here's the recipe ~

Mix together:
2 cups graham cracker crumbs
1 cup butter, softened
3 1/2 cups powdered sugar
1 cup creamy peanut butter
1 cup finely chopped walnuts
1 cup grated coconut
1 teaspoon vanilla 


Form 1" balls and dip into:
1 pound of milk chocolate pieces for fondue and candy making
(start with a half pound and melt more as needed)

They will be ready to serve in a matter of minutes!
I ended up refrigerating my leftover Bon Bons which
caused the chocolate to harden (which added a nice texture).  

This recipe makes approximately 45 Bon Bons.
 

These are a nice do-ahead treat.
Perfect for holiday gift giving!

Pinterest.

Wednesday, October 17, 2012

 I thought I was past that addicted stage.
You know, where you go from wasting an hour or more a day on it 
to just 5 or 10 or 15 minutes.
 
But I'm kind of loving it these days.
Especially 'cause I can do it on the iPad while I watch things like
the Presidential debates with my hubby  
(makes it not so boring)
or one of our many shows like Chopped, Shark Tank or the Bachelor. 
 
Feels like I'm killing two birds with one stone, ya know?
(Hmmm... What if the two birds are wasting time and wasting time?  Does that really count?)
 
Anyways,
What about you?
Do you go in spurts with it?
 Do you use, make or do any of the things you see on there?

I don't know about you but I have really good intentions of having my whole house organized just as fabulously as it looks on my "Ultra Organized" board.  And, I'm pretty sure one of these days I'm going to make all of the recipes I have on my "Sweet Treats", "Yum", "Good Morning" and "Drink Me" boards.  And at the same time, I'll be as strong and tough as I am on my "Be Fit" board and my home will be as beautiful as "My Dream Home" board.
 
 ~ YEAH RIGHT ~
 
I guess it's easy to get overwhelmed with all of the loveliness on there.
You have to be able to brush off all of the perfection that you see.
 
But it's kinda fun trying.
A little inspiration, motivation and eye candy never hurt.
 
Unless...
You eat half a pan of these:
Which I'm pretty sure I did over the course of a couple days.
(These revel bars are super easy.  The recipe makes a ton.  They freeze well.  And they're really yummy.)


You may also feel a little regret when you tell yourself you're just going to have one bite of one of these Mummy Twinkie Pops (I mean, after all, you have to try the fruits of your labor and besides you don't even really like Twinkies) but you end up eating the whole thing anyways cause it was actually quite tasty. 

(I took them to our family Halloween party last Monday.  They were so cute.  I just couldn't resist.  It cost about a dollar a pop to make them and I got all the supplies at Wal-Mart.)


Another thing I made 
(that I spied on Pinterest and didn't feel bad about) 
were these burp cloths:


They were fun to make and it's nice to (for once) feel "on the ball" ~ 
It's nice to have a stash of homemade baby gifts that I can go to on a moments notice (as if 9 months notice wasn't enough).

I'm just saying that Pinterest is fun and there are lot of good ideas on there.  And you can have fun trying some of them.
But you just have to be careful.
That you don't feel like you have to do all of them.
Just do one or two or three.  
Once in a while.

Now, it is two-fifteen in the afternoon.  
So I need to go get my bra on and my makeup done and my hair flat-ironed because I just wasted a lot of time talking about a really good time waster.

So.  Good-bye :)

Apple Crumb Pie

Monday, November 14, 2011

Is it bad to have apple pie for breakfast?


Because I did.

This Martha Stewart Apple Crumb Pie.

Minus the raisins (ew).

It was delicious.

(Thanks mom and dad for the bucket of apples :)

Hope you all have a great day!

P.S.  Come back tomorrow for another Tuesday Tips.

Parfait Cookies

Thursday, September 1, 2011

These are my favorite chocolate chunk cookies.
The secret ingredient?
Symphony bars and almond extract.
So yummy and so easy.

Here's what you'll need:


3/4 c. sugar
3/4 c. brown sugar
3/4 c. butter, softened
2 eggs
2 tsp. almond extract
3 cups flour, divided
1/2 tsp. salt
1/2 tsp. baking soda
2 large Symphony bars (with almonds and toffee)

Preheat oven to 350 degrees.

In a large bowl, cream together the two sugars and butter.


Beat in the eggs and almond extract.


(Don't I have a cute little helper?)


In a small bowl, combine 2 (of the 3) cups of flour with the salt and baking soda; add to the butter/sugar mixture and combine.


Using a wooden spoon, add the additional flour so that the dough just barely ceases to be sticky (I always end up adding the entire remaining cup).


Chop up the Symphony bars into half inch chunks.


Stir in chocolate chunks with the wooden spoon.


Drop by heaping teaspoonfuls onto a greased baking sheet.


Bake for 7-9 minutes or until done.  Do not over bake (the key is to almost under bake).  Cookies should have just a tinge of brown but mostly remain white, soft and high.


Enjoy!


This recipe makes about 3 dozen cookies.

** I always like to have a couple of Symphony bars and almond extract on hand for this recipe.  It's so quick and easy and a fun change from the usual chocolate chip cookies (which I am not a HUGE fan of). 

 ~Thanks to my friend, Brooke, for giving me this delicious recipe!

I'm kind of a loner.

Wednesday, March 23, 2011

I don't have a lot of close friends that quilt. 
So when one of my bestest (non-quilty) friends told me she wanted to make a quilt (and asked ME if I would help her) I jumped all over the chance.  She looked around the Internet and sent me pictures of some quilt blocks she liked.  We quickly decided on a string quilt because who could resist such a cute quilt as this?

We roped in two more "non-quilty" friends to join the fun and last night we had our first work-night.  I told them not to buy fabric quite yet and that I would supply some for their first few blocks (at least).


(This may not look like much, but I probably have enough fabric in this basket to make 2 or 3 quilts!)

These blocks were so simple and so fun to make. 
No matching up seams. 
No making sure you get the right color in the right place. 
This was such a great project for a newbie quilter. 
And a great way to use up scraps! 

We followed Ashley's tutorial to make our first few blocks:


We made a big mess (I didn't mind) and had lots of fun.
No one else would pose for the camera :) but this is Keri who headed up this fun project.  Thanks, Keri!


Of course, it would not be a true girls night, without treats, so I made
Nutter Butter Frozen Peanut Butter Pie:


Recipe:
24 Nutter Butter cookies
5 Tbsp. butter, melted
8 oz. cream cheese, softened
1 cup creamy peanut butter
3/4 cup sugar
1 Tbsp. vanilla
8 oz. container of cool whip topping, thawed, divided

Crush cookies.  Mix cookie crumbs and butter.  Press onto bottom and sides of 9-inch pie plate.  Mix cream cheese, peanut butter, sugar and vanilla on medium speed until well blended.  Gently stir in 1-1/2 cups of whipped topping.  Spoon into crust.  Freeze 4 hours or overnight until firm.  Let stand 1/2 hour before serving.  Garnish with remaining whipped topping and additional cookies if desired.  Special garnish ~ just before serving, drizzle chocolate syrup on plates.

**I'm such a sucker for chocolate and peanut butter!  See here.**


Anyways, I know I said this project was a great stash buster, but I had to buy just a few additions today while I was at workJust a few more colors that I did not have a lot of to make sure it will be bright and colorful.  Adding just a few new additions to "old scraps" makes the whole project feel fun and exciting!


One perk of working at a fabric store ~ cutting myself 3 inch strips of each one of these fabrics so I would have a nice variety of colors and prints in my quilt.  About $15 for all of this (before my discount).

Raspberry Butter

Wednesday, December 22, 2010

We love this sweet treat.
If you like "spreads", then you'll enjoy this on your breads and rolls this holidays season (well, anytime of year for that matter!) 


Here's what you'll need:

1/2 lb. butter
6 oz. raspberry jam
3 oz. honey
1/2 tsp. vanilla

Whip butter.  Add remaining ingredients.  Whip until mixed.
[Couldn't get much easier than that!]

*1 batch fills about 4 1/2 half-pint jars

It's super yummy and easy to make and makes a great gift!


Now that is my kind of "canning!"

{Chocolate Mint Brownies}

Sunday, September 12, 2010


Before I give you the recipe for these scrumptious, mouth-watering delights, let me first tell you that the original recipe comes from Callie over at the wonderful blog, called Make It Do.  Check out Callie's "Famous Mint Brownies" tutorial for pictures and tips on how to get each layer silky smooth.  I've made just a couple of minor tweaks to Callie's recipe though so I'll put the recipe here (how I make it). 

Note: My version includes a cream cheese mint frosting and a small clarification on the ganache.  If you're not a cream cheese frosting-kind-of-girl (or boy) then you'll want to follow Callie's recipe for sure.

CHOCOLATE MINT BROWNIES

(Recipe for 1 1/2 times is in parenthesis)

Whisk together:
1 c. melted butter (1 1/2 c.)
1/2 c. cocoa powder (3/4 c.)

And then add:
2 c. sugar (3 c.)
4 eggs, beaten (6)
1 tsp. vanilla (1 1/2 tsp.)
1/2 tsp. salt (3/4 tsp.)

Mix well and then add:
1 1/2 c. sifted flour (2 1/4 c.)

Stir in by hand.  Do not over mix.

Pour into 9 x 13 pan sprayed with cooking spray.  If making 1 1/2 recipe pour into Baker's Half Sheet (large cookie sheet.)  Bake at 350 degrees for 25 - 28 minutes.  Cool for a few minutes and then place in freezer for 20 minutes.

While brownies are in the freezer make first layer of topping.

Cream Cheese Mint Frosting:
1/2 c. butter, softened 
4 oz. cream cheese, softened 
2 1/2 c. powdered sugar
1 1/2 tsp. peppermint extract
Green or pink food coloring (optional)

This frosting recipe will work for either the 9 x 13 or the baker's half sheet of brownies. 

Mix thoroughly.  Evenly frost brownies and put back in freezer for 20 minutes.  Make chocolate ganache top layer.

Chocolate Ganache Topping:
1/2 c. unsalted butter (3/4 c.)
1 1/2 c. semi-sweet chocolate chips (2 1/4 c.)

Melt and wisk together.  (I melt them together in a Pyrex measuring bowl in the microwave for one minute.  Be careful not to overheat.  It won't look melted but once whisked it is.)  Drizzle warm chocolate over brownies and spread smooth with a spatula.  Put back in freezer for another 20 minutes.


Enjoy!
(Rae Ann,  I stole this picture from you.  You took better pictures of my brownies than I did! :)

Here's another thing that I'm a fan of:

Wednesday, April 28, 2010

Reese's Peanut Butter Cups.  I mean, come on, who isn't?


I especially love the Mini Reese's Peanut Butter Cups.  They have a higher peanut butter to "cup" ratio (actually don't quote me on that.  It just seems like they do.)  But, you can't go wrong with these little guys. 

So if you like peanut butter cups and you like cookies, then you will really be in heaven with this recipe.  Check it out. 

You will need:
1 bag of Mini Reese's Peanut Butter Cups
1/2 cup. butter
1/2 cup peanut butter (I use creamy)
1/2 cup sugar
1/2 cup sugar
1/2 cup brown sugar
1 egg
1tsp. vanilla
1 1/2 cup flour
1 tsp. baking soda
1/2 tsp. salt

Directions:
Cream butter, peanut butter and sugars together.  Add egg and vanilla.  Beat well.  Combine flour, baking soda and salt; add to creamed mixture.  Place dough in rounded teaspoons in greased mini muffin pans.  Bake at 350 degrees for 10-12 minutes (I cooked mine for 9 minutes and that was just right.)  Right out of the oven, place a mini Reese's Peanut Butter Cup in the center of each cookie.  Refrigerate until shine from chocolate disappears.  Gently pop out with the tip of a knife.  ~yield: 2 1/2 dozen

I haven't made these for a long time, but decided to make them this afternoon for my scout group (yep, that's right ~ I'm a den mom:)  Someday I'll show you a pic of me in my yellow Scout shirt.  It's hot.  Just kidding.  It is sooo not hot.) 


Anyways, as you can see, my little sidekick had fun helping me prepare the "goods" for our activity. 


The reason I am posting this is because I thought I needed to stop eating them, so I decided to write about them instead. 

So, what is your favorite treat?

One more recipe

Monday, January 11, 2010

So I don't have a picture for this recipe, but my friend Emily sent this to me today.  She was going to come to our girls night last week, but didn't end up making it.  These are the cookies she was going to bring that night.  She is an awesome cook and I always love the fabulous treats she brings to our get-togethers, so without even trying this, I am going to post it because (from my past experiences with Emily) I'm sure these are to die for. 

Loaded Oatmeal Cookies with Brown Butter Icing

1/2 cup (1 stick) butter, softened
1/2 cup vegetable shortening
1 1/2 cups packed light brown sugar
2 eggs
1/2 cup buttermilk
1 3/4 cups all-purpose flour
1 teaspoon baking soda
1/2 teaspoon salt
1 teaspoon baking powder
1 teaspoon ground ginger
1 teaspoon freshly ground nutmeg
1 teaspoon ground cinnamon
1/4 teaspoon ground cloves
1/2 teaspoon ground allspice
2 1/2 cups quick-cooking oatmeal
1 cup raisins
1 1/2 cups chopped walnuts
1 teaspoon pure vanilla extract
Brown Butter Icing, recipe follows


Directions
Preheat oven to 350 degrees F.
Grease 1 or more cookie sheets. Using an electric mixer, cream together butter, shortening, and sugar in a bowl until fluffy. Add eggs and beat until mixture is light in color. Add buttermilk. Sift together flour, baking soda, salt, baking powder, ginger, nutmeg, cinnamon, cloves, and allspice; stir into creamed mixture. Fold in oatmeal, raisins, walnuts, and vanilla, blending well. Drop by rounded teaspoons onto cookie sheet. Bake for 12 to 15 minutes. Drizzle with Brown Butter Icing.


Brown Butter Icing:
1/2 cup butter
3 cups sifted powdered sugar
1 teaspoon vanilla extract
3 to 4 tablespoons water

In a small saucepan heat the butter over medium heat until golden brown, stirring occasionally. Remove saucepan from heat; stir in 3 cups sifted powdered sugar and 1 teaspoon vanilla. Stir in enough water (3 to 4 tablespoons) to make an icing of drizzling consistency. Drizzle on warm cookies.

Doesn't that Brown Butter Icing sound fabulous?  Thanks, Emily!  I'll have to try them soon.