Showing posts with label sawtooth star. Show all posts

Chris' Christmas Quilt

Monday, December 4, 2023

 Hello, hello!
I recently had the pleasure of making
a Christmas quilt for a friend.  She was looking 
for a quilt in dark colors that would really pop 
against her white shiplap walls.  After seeing her space
(so I could get a sense of her style) and discussing
a few ideas, I came home and pulled these fabrics.


I decided to go with mostly red, green, and black fabrics with little pops of gold, white, and brown.


We discussed just making stars - which would be really easy to accommodate the unique size she wanted the quilt to be.  She has a wall right by her front door that needed a little something special...so she wanted the quilt to be about 42" x 72".


While making this quilt, I laid out sets of fabric for each block - a row or two at a time - so I could make sure the colors were spread out and balanced.  It was also important to me to have contrast between each block so that each one stood out and didn't get "lost" in the scrappiness of this quilt.


My friend, Jen Ostler (@drycreekquilter on Instagram) quilted it for me with some classic crosshatch quilting.  My friend's style is transistional so I figured she wouldn't want anything too cutesy.  I think the crosshatching compliments the diagonal lines of the star points really well.


As many of you know, Jen always quilts a little hidden object into the quilting.  It makes for a fun game of hide and seek. Great for kids!  Can you find the star in the picture above?


I found this pretty olive green woven fabric for the back and I had the red stripe binding fabric for another quilt but ended up liking it more for this quilt!


It was so fun to work on the binding while it snowed outside!


I watched Christmas movies and felt extra festive and cozy while binding it!


I used my Sawtooth Star Cutting Chart to make 7" stars and did a 6 x 10 layout (so 60 blocks total).
Click HERE for the cutting chart and tutorial.


I hope my friend likes it!  She didn't really want to be involved in the process.  (I think she was being nice and letting me "do my thing" but she also said she would get overwhelmed if she had to pick out the fabrics - even though she has really great taste!)


I don't usually do commission quilts but this was really fun for me to do.  I loved seeing my friend's home and Christmas decor and trying to make something that would fit in perfectly there.  I really hope
this is what she envisioned!


Now it's time to deliver it!  So fun!

Happy holidays my friends!

My Red, White, and Blue Quilts

Tuesday, June 6, 2023

Hey friend.  I've been meaning to share with you all of my 
red, white, and blue quilts - together in one place.  
Hopefully, if you're wanting to make a
patriotic quilt, you'll find some inspiration here!


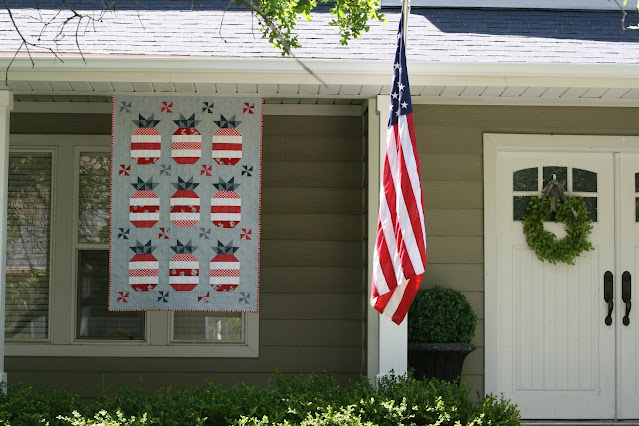
First up is my Star-Spangled Pineapples quilt.
This is a free pattern that Amanda Niederhauser (@jedicraftgirl) 
and I created for our Five Fat Quarter Fun series a few years ago.


HERE is a link to the free PDF pattern and
HERE is a link to the original blog post with more photos and details.


Next up are my beachy, faded Stars and Stripes quilt
and my No-Point Stars quilt.


Both of these patterns are by other quilt pattern designers.
Stars and Stripes is by Camille Roskelly of Thimbleblossoms and it's available
in her shop HERE.  The No-Point Stars pattern is a free tutorial by
Allison Harris of Cluck, Cluck, Sew.  You can find it HERE.
I don't have blog posts up yet about my versions.
I want to share more details so I'll do that soon in another, separate post.

Another red, white, and blue quilt that I made
many years ago is my Scrap Jar Stars quilt.


This is a great stash-buster project!
This pattern comes with instructions for 4 different size quilts
and is available in my Etsy shop HERE.

I've also made my United quilt in 2 different color ways.  


It has 50 really simple flag blocks (to represent the 50 states) 
plus 5 stars and a heart block!  It's a fun make and very beginner-friendly!
United finishes at 78-1/2" x 87-1/2".
You can find the pattern in my Etsy shop HERE and
HERE'S a blog post with all the details about the navy one.
And you can see the low volume one HERE.

If you're looking for a really simple star/flag quilt
check out my Glory quilt HERE.
I share a free cutting chart & tutorial for Sawtooth
Star block sizes 3" - 20" plus all the details for this quilt.


Another option is a red, white, and blue Star Patch quilt!
I've made 3 Star Patch quilts (a colorful one, a red and white one,
and this one).  It was just screaming to be made up in 
red, white, and blue don't you think!?!


And for all you scrap lovers out there, I've got a tutorial
for this Firework quilt.  I made a baby-size but it
would be really easy to make it bigger.  A coloring sheet is included.


And if you're in the mood for some simple patchwork,
I've got this red, white, and blue Rough and Tumble quilt pattern.
It comes with instructions for 5 different quilt sizes and is great for beginners!


I think it would be cute to layer any patriotic quilts
with a simple red or blue quilt (like the ones that I made for my new book,
Quilt the Rainbow).

[Sew Delightful.  Photo courtesy of Martingale.]

[Patchwork Plaid.  Photo courtesy of Martingale.]

You can find both of those patterns in Quilt the Rainbow; available HERE.

I recently finished this


This is a 2-1/2" x 42" strip-friendly pattern with 2 size options.
Click HERE for the paper pattern or HERE for the PDF.


I feel like you can never have too many red, white, and blue quilts!
Do you have a favorite of the quilts I shared today?

I hope you found some inspiration here!
Happy Summer friends!

Glory Quilt

Thursday, August 11, 2022

 If you've been following along with me
on Instagram you may have seen a simple
star/flag quilt I made in July.  I finally got it bound and
photographed so I want to share the details
with you today.


In June of this year, I took a trip to McCall, ID, and happened 
upon a really incredible quilt shop called,
J. Beck Home.  I was inspired by the red, white, and blue
fabrics and vintage quilts there and ended up
buying most of the above fabrics.  I had something like this
design floating around in my head for what to do with them:


I used instructions from my recently published
Sawtooth Star Cutting Chart to make the stars.
It includes cutting instructions for block
sizes 3" - 20".  Click HERE to check it out.
I made 12" finished stars for this project.


I was a little nervous that this pattern was going to be too simple
but when it was all said and done, I loved it!


The background fabric I used is a light gray/puddy color
called Celestial by Art Gallery Fabrics.
The backing fabric I used is from the Watermark collection
by Tammy Green for Riley Blake Designs.
The binding fabric is Stripes C495 by
Riley Blake Designs.


I had my quilter, Jen Ostler in Highland, UT.
quilt it for me with a 3/4" grid.  I've had that size grid done before
and loved it.  I don't think it makes the quilt too stiff
and it's just so pretty!


She quilted her signature "hidden object" in one of the
squares -  the tiniest little star!  I just love it!


The labels are from Everemblem.
I get the 2" cotton, fold-over, sew-in labels.
If you go to their site, you'll have to pick a cotton label 
and customize it from there.  I've loved the ease of these labels.
Now I don't have an excuse to not label my quilts!


My quilt finished at 63" x 93"
(so about the size of an XL twin
commercial size comforter).


I turned it sideways on my king-size bed
and it makes for a really nice coverlet!


I wasn't planning on doing a pattern
or full tutorial for this quilt but I know 
some of you want to make something similar
so here are a few more details:

Make 12" finished stars using my Sawtooth Stars Cutting Chart.
(There's a tutorial on that blog post for how to make the stars.)
Sashing and borders - cut 3-1/2" wide strips.
Binding - cut (9) 2-1/2" wide strips.

FABRIC REQUIREMENTS
Red stars: (18) 1/4 yard prints
Blue Stars: (6) 1/4 yard prints
Background: 4-3/4 yards
Backing: 5-2/3 yards
Binding:  2/3 yards 
Batting: 71" x 101"


Apparently, there was a right and wrong side to the
Celestial solid fabric I used for the background.
I didn't notice until I took the above picture.


I hope you found inspiration here today!
Thank you to @imacoffeemom on 
Instagram for helping me name this quilt.
If you decide to make something similar to this
I'd love to see it on Instagram.
Tag me @gigis_thimble and use the hashtags
#gigisthimblepattern and #gloryquilt.

2 Stars A Day Quilt Finish

Friday, July 22, 2022

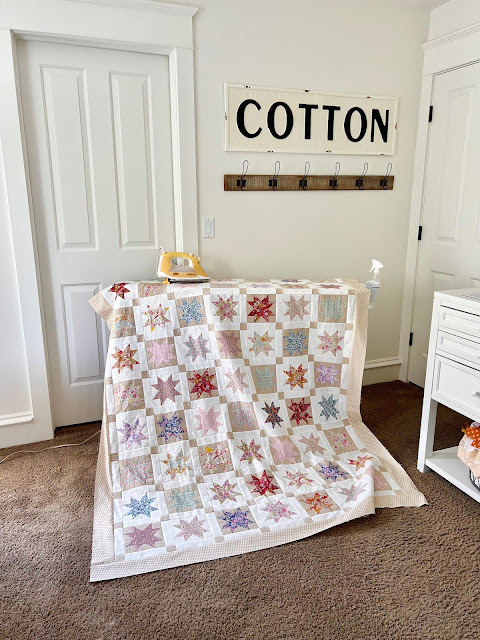
 I finally got some photos of my
finished 2 Stars a Day quilt!
If you want the simple, free pattern
 for this project click HERE.


I was looking for a way to use up my
beautiful Liberty fabrics and got the wild idea to
make 2 stars a day for a month with them.  It was a fun
challenge project and a good way to practice a little
stick-to-itive-ness.


I had all the star fabrics in my stash, as well as, the two background fabrics
(which were both linen fabrics - one tan and one cream.  Sorry,
I don't know the names of the manufacturers or exact colors.)  I also
had the border fabric in my stash, which was a cream and tan
geometric print from the line Farmhouse by Fig Tree and Co.


I bought the plum color binding fabric and the 
floral backing fabric at Harmony in Provo, Utah.  
There wasn't any info on the selvage of the binding fabric
but the backing fabric is from the line Sevenberry
by Robert Kaufman.


The quilting was done by my friend Jen Ostler in 
Highland, Utah.  She used a panto called Domestic Stitches -
Squared by Leisha Kaye Farnsworth.  It was a new-to-me
design and I love it!  I thought it complimented the stars
and the heirloom feel of this quilt, perfectly!


The labels are from Everemblem.
I get the 2" cotton, fold-over, sew-in labels.
If you go to their site, you'll have to pick a cotton label 
and customize it from there.  I've loved the ease of these labels.
Now I don't have an excuse to not label my quilts!


This quilt finished at 60-1/2" x 75-1/2";
a nice throw size quilt!


I love a good star quilt and don't seem
to have enough of them in my life!


By using two different background colors
along with sashing in the same colors, it created
an almost circular secondary design.
Do you see it?  If not, squint your eyes a little.


Well, what do you think of my 2 Stars a Day quilt?
It was a fun project to make and I'm really happy with
how it turned out.  This is a great stash-buster project.
Let me know if you end up making it.  If you post about it on
Instagram please use the hashtags #gigisthimblepattern
and #twostarsadayquilt so I don't miss it!

Happy quilting friends!

Sawtooth Star Cutting Chart + Tutorial

Saturday, June 25, 2022

Today I have a little gift for you!
It's simple but hopefully, you'll enjoy it!
The Sawtooth Star block is one of the most basic,
yet classic quilt blocks around and today
I have a cutting chart for finished block sizes 3" - 20"!


Sawtooth Star Cutting Chart

FINISHED

BLOCK SIZE

BACKGROUND FABRIC

CUTTING

STAR FABRIC

CUTTING

3”

(4) 1 ¼” squares

(4) 1 ¼” x 2” rectangles

(8) 1 ¼” squares

(1) 2” square

4”

(4) 1 ½” squares

(4) 1 ½” x 2 ½” rectangles

(8) 1 ½” squares

(1) 2 ½” square

5”

(4) 1 ¾” squares

(4) 1 ¾” x 3” rectangles

(8) 1 ¾” squares

(1) 3” square

6”

(4) 2” squares

(4) 2” x 3 ½” rectangles

(8) 2” squares

(1) 3 ½” square

7”

(4) 2 ¼” squares

(4) 2 ¼” x 4” rectangles

(8) 2 ¼” squares

(1) 4” square

8”

(4) 2 ½” squares

(4) 2 ½” x 4 ½” rectangles

(8) 2 ½” squares

(1) 4 ½” square

9”

(4) 2 ¾” squares

(4) 2 ¾” x 5” rectangles

(8) 2 ¾” squares

(1) 5” square

10”

(4) 3” squares

(4) 3” x 5 ½” rectangles

(8) 3” squares

(1) 5 ½” square

11”

(4) 3 ¼” squares

(4) 3 ¼” x 6” rectangles

(8) 3 ¼” squares

(1) 6” square

12”

(4) 3 ½” squares

(4) 3 ½” x 6 ½” rectangles

(8) 3 ½” squares

(1) 6 ½” square

13”

(4) 3 ¾” squares

(4) 3 ¾” x 7” rectangles

(8) 3 ¾” squares

(1) 7” square

14”

(4) 4” squares

(4) 4” x 7 ½” rectangles

(8) 4” squares

(1) 7 ½” square

15”

(4) 4 ¼” squares

(4) 4 ¼” x 8” rectangles

(8) 4 ¼” squares

(1) 8” square

16”

(4) 4 ½” squares

(4) 4 ½” x 8 ½” rectangles

(8) 4 ½” squares

(1) 8 ½” square

17”

(4) 4 ¾” squares

(4) 4 ¾” x 9” rectangles

(8) 4 ¾” squares

(1) 9” square

18”

(4) 5” squares

(4) 5” x 9 ½” rectangles

(8) 5” squares

(1) 9 ½” square

19”

(4) 5 ¼” squares

(4) 5 ¼” x 10” rectangles

(8) 5 ¼” squares

(1) 10” square

20”

(4) 5 ½” squares

(4) 5 ½” x 10 ½” rectangles

(8) 5 ½” squares

(1) 10 ½” square


Click HERE for a printable version of this chart.
(Please do not redistribute this chart; it is for your personal use only.
But please do tell your quilting friends about this post so they can
check it out for themselves!)

Here's a quick tutorial on how to make a Sawtooth Star block:
(Please note: the seam allowance is 1/4".)

1. Cut out the required pieces for your chosen block size.


2. Draw a diagonal line from corner to corner on the wrong side of your smaller
squares from the Star fabric.  (You can skip this step if you have Diagonal
Seam Tape from Cluck Cluck Sew.  See product information for details).


3. Place a marked square on one end of a background fabric rectangle
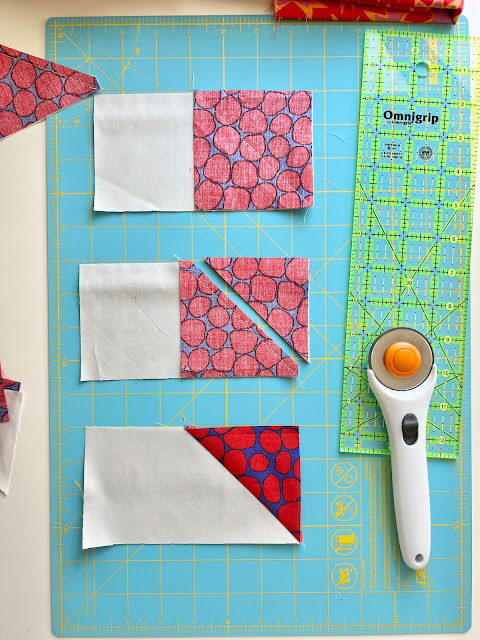
with right sides together.  Stitch on the marked line.  Trim 1/4" from the line.  
Press the seam allowance toward the dark fabric.


4.  Repeat step 3 on the opposite end of the rectangle.  Make 4 Flying Geese units. 


5. Layout the 4 Flying Geese units, 4 background fabric squares,
and 1 large square from your Star fabric as shown.  Sew the pieces
together in rows.  Press the seam allowances toward the squares.


6. Sew the rows together and press the seam allowances toward
the block center.


And there you have it!  A very classic Sawtooth Star block!

Note: I am making 12" Stars for my project.  The cutoffs from making
my Flying Geese units are a decent size so I plan to
make those into Half-Square Triangles for a bonus project!

Also, if you are not using sashing between the blocks,
I would recommend pressing your seam allowances open.
I am using sashing between my blocks.

[6" Stars from my Two Stars a Day quilt]

I hope you find this cutting chart and tutorial
very useful, for many years to come!
Tag me on Instagram if you use them!
I'd love to see what you're working on!

Happy quilting!