Showing posts with label Stash Hash Quilt. Show all posts

Stash Hash Christmas Quilt - Finished!

Friday, January 15, 2021

 Oh my gosh, you guys!  I totally dropped the ball on posting my finished
Stash Hash Christmas quilt from the Stash Hash Quilt-Along!
I finished it in October and just never got around to taking pictures of it!
I really wanted to take pictures of it outside in the snow but we have had hardly 
any snow this year so it just never happened!  And I get tired of having the same 
backdrops for my photos from inside my house so I was just putting it off...

Until today!
I finally snapped some pictures of it on my son's bed and it wasn't a big deal!  I don't 
know why I put it off for so long!  I truly apologize - especially to my Quilt-Along 
friends who were waiting to see the finished quilt!


Stash Hash comes with instructions for 3 different sizes.
This is the Full size (the biggest size).  My son has a queen bed for reference.
The finished quilt dimensions are 80 1/2" x 80 1/2".


I participated in a Christmas 10" square swap with my local quilt
group a while back so I used those fabrics for this.  Stash Hash is 5", 10", and 2 1/2" precut 
friendly.  It's a great way to use up scraps or stash and it looks great in any color scheme.  
So it's a really versatile pattern!


I backed it with cream minky and bound it with Christmas Memories Plaid Multi 
by Riley Blake (cut on the bias).  It is so snuggly (and big - which makes it even better!)


The beautiful quilting was done by Jen Ostler in Highland, UT.
I found the new-to-me design called Starstruck_small QC and I love 
how it turned out!!  Jen always does a fantastic job!


As you can see the blocks are pretty big.  I'd say this would be a great pattern
for a confident beginner and beyond.


If you'd like to purchase this pattern you can visit my Etsy shop HERE.

Thank you for stopping by today friends!
Happy quilting!

Stash Hash Quilt-Along: Week 6

Monday, August 24, 2020

 Good morning friends!  I hope you all had a great weekend!
Mine was very restful and I definitely needed that time to rejuvenate from some commitments 
I had these past few weeks!  I did do some sewing on my Stash Hash quilt...
which brings me to introduce the assignment for week 6 of the Stash Hash Quilt-Along.


The assignment for this week is to make 3 Hashtag Blocks.
These are easy peasy (as you already know).  Especially when you chain-piece each of the units.

Chain-piecing is a time-saving quilting technique similar to an assembly line.
You repeat a single sewing step for all the blocks of a quilt without cutting threads 
between each section until after you are done with that step.  
It creates a "chain" of pieces and saves time and thread.


I chain-piece basically everything I can.
I find it helpful to determine the number of units I need for each part of a block
and then multiply that number by the number of blocks I need.  For instance,
for each of the 4-Patch units needed for the Hashtag blocks, 
I need two dark/light units (a total of 8 dark/light units per block)
So I multiply 8 x the 3 blocks I need to make and I get 24 dark/light units.
Then I count out 24 dark squares and chain piece a light square to each of them.


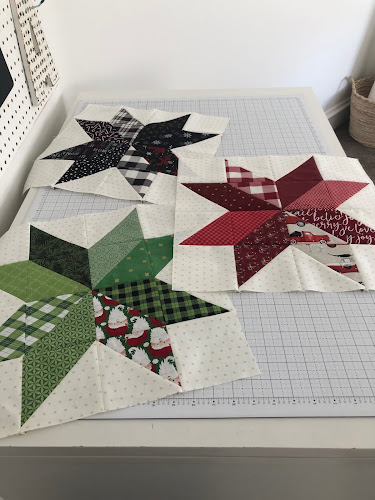
Here are my 3 blocks for this week (above and below).


It's fun to see all the fabrics come together in one block!


So that's it for this week!

Please keep sharing your blocks on Instagram.
It makes me so happy to see them and
I know it inspires others as well.  Plus,
it helps spread the word about my patterns which I really appreciate!
Please tag me @gigis_thimble and use the hashtags
#gigisthimblepattern, #stashhashquilt, and #stashhashqal
if you decide to share.  

If you're looking for the Stash Hash quilt pattern, visit my shop HERE.

Happy quilting!

Stash Hash Quilt-Along: Week 5

Monday, August 17, 2020

 It's week 5 of the Stash Hash Quilt-Along and I hope you're having as much fun as I am!


The assignment for this week is to make 2 Star Blocks.


See week 3's blog post HERE if you want my helpful tips and tricks.
Please refer to your Stash Hash block assembly instructions for details.


I am having so much fun playing with the fabrics I received from
a Christmas 10" square swap I did with my local quilt guild. 


I love seeing all the different fabrics come together. 


It makes me so happy seeing your blocks on Instagram!
I know it inspires others to see them as well.  Plus,
it helps spread the word about my patterns which I really appreciate!
Please tag me @gigis_thimble and use the hashtags
#gigisthimblepattern, #stashhashquilt, and #stashhashqal
if you decide to share.  


If this is the first time you've heard about the Stash Hash Quilt-Along it's not too late to join.
HERE'S the link to the Stash Hash QAL Homepage and you can get the pattern HERE.

Let me know if you have any questions!
Happy sewing!

Stash Hash Quilt-Along: Week 3

Monday, August 3, 2020

Good morning!  Welcome to week 3 of the Stash Hash Quilt-Along!

Are you ready to start sewing?
The assignment for this week is to make 3 Star Blocks.
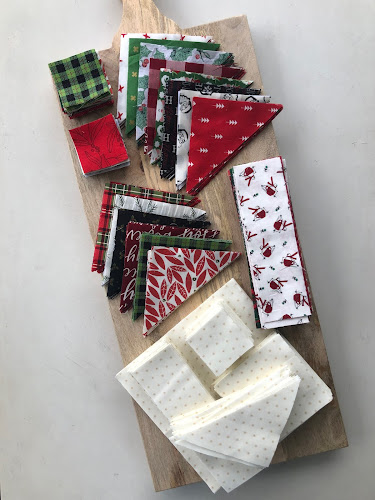
So pick out 3 sets of bright print triangles, get your background triangles and squares, 
and lets get started!  Below are some helpful photos and tips but please
refer to the Stash Hash Block Assembly instructions for specifics.


Lay out one set of 16 bright print triangles to form a star.  
Note that triangles for the star points are adjacent to matching triangles 
in the block center, forming diamonds in the completed
block as shown above.  I like to lay out the triangles so there is contrast 
between each different print diamond and a balance between dark and light 
prints across the block.  Doing that will make each diamond pop!


Sew pairs of triangles together along the long edges to form Half-Square Triangles.


I like to keep the pairs in order as I sew them together (as well as when I press 
the seam allowances and square up the Half-Square Triangles because it makes it 
easier to put the units back in place before sewing them all together).


Press the seam allowances and then square up each Half-Square Triangle.


If you have questions about how to square up Half-Square Triangles 
check out THIS tutorial I created.  I think you will find it helpful! 
 

Lay out the Half-Square Triangles Blocks and the 4 background squares.
Sew all of them together, press the seam allowances and voila, 
now you have your first Stash Hash Star Block!  

Note: I know pressing seam allowances open is not the easiest, most enjoyable 
thing to do but it will help your block to lay nice and flat when finished.  
Because your seams won't "nest" like they do when you press seams to one side
it's even more important to cut accurately and make sure your seam allowance is 
an accurate 1/4" seam allowance.  You may want to make sure your 1/4"
seam allowance is spot on before starting.


Repeat the steps above to make a total of 3 blocks.

So that's it for this week!
I'd love to see your blocks on Instagram if you decide to share.
Please tag me @gigis_thimble and use the hashtags
#gigisthimblepattern, #stashhashquilt, and #stashhashqal 
so I don't miss a thing.

If this is the first time you've heard about the Stash Hash Quilt-Along it's not too late to join.
HERE'S the link to the Stash Hash QAL Homepage and you can get the pattern HERE.

Let me know if you have any questions!
Happy sewing!
Amber

Stash Hash Quilt-Along: Week 2

Monday, July 27, 2020

Good morning!  Welcome to week 2 of the Stash Hash Quilt-Along.


The assignment for this week is to do all the cutting for your chosen quilt size.
Note: If you're doing a scrappy background it may take longer to do the cutting.
You're welcome to cut fabric each week as needed but if you take the time
to do all the cutting this week it will make the assignments for weeks 3-12 to go a lot faster.


I have a time-saving tip for cutting the non-scrappy background fabric.
Check out my tutorial for Quick Rotary Cutting.  

Follow the idea there to cut your background strips 
and then crosscut into squares or rectangles.

To quickly cut the 5" squares on the diagonal once, keep your 
squares in place on your cutting mat while you make the diagonal cuts.   


You should be able to cut through several squares
(in adjacent rows) in one swoop as shown in the next few photos.


Be careful not to bump or move the pieces as you move the ruler to the next diagonal.


Cut through all of the squares once.


And voila!  You'll have all of the triangles 
needed for the star point HST's cut in a snap!


You can use the Quick Rotary Cutting method 
to cut all of the background pieces.


It will take a little more time to cut your bright fabrics but
enjoy seeing those pretties that you've treasured for so long!
This is when you get to plan the color scheme for each star.


After you finish cutting you will be all ready to start sewing next week.
I think you're going to LOVE seeing these blocks come together!


So that's it for this week!
Tell me below what size quilt you're making.

I'd love to see your progress on Instagram if you decide to share.
Please tag me @gigis_thimble and use the hashtags
#gigisthimblepattern, #stashhashquilt, and #stashhashqal 
so I don't miss a thing.

Also, just to let you know, I decided to continue sending the weekly reminders.
It seemed like a lot of you appreciate getting them and I am happy to do it.
Thanks for your input on that!

Have a great week!
Amber

Stash Hash Quilt Along: Week 1

Monday, July 20, 2020

Are you guys ready to get this party started!?
I'm so excited the day is finally here!


It's week 1 of the Stash Hash Quilt-Along and the assignment for this week is to gather 
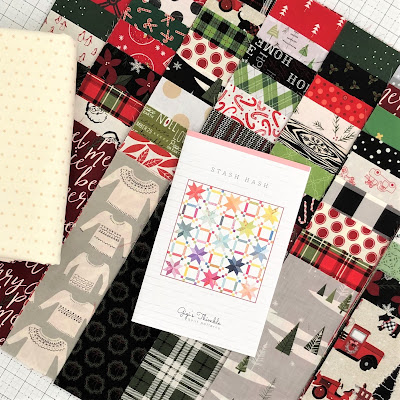
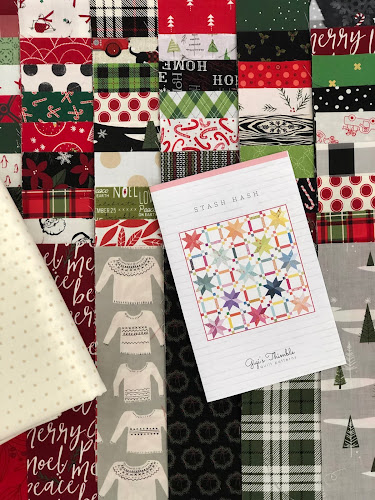
the pattern and fabrics you plan to use.  I'm making a Christmas version because I have some 
really fun Christmas 10" squares I received in a swap I participated in a year or so ago.


As I've said before, Stash Hash is a great stash buster quilt 
AND it's perfect for pre-cuts!  It requires 5" squares, 2 1/2" squares and some 
2 1/2" rectangles so the 10" squares will give me what I need.


I'm excited to finally put those swap squares to good use!


For my background fabric, I am using the cream fabric that has little 
tan asterisks on it.  It's from the fabric line Christmas Figs II by Fig Tree & Co.  
I think it will add a nice contrast to my Christmas fabrics.


So that's it for this week!  We're starting things off nice and easy!

Will you do me a favor and post a picture on Instagram showing me your fabrics?!?
Be sure to tag me @gigis_thimble and use the hashtags 
#gigisthimblepattern, #stashhashquilt and #stashhashqal.  
I can't wait to see (and I think others will enjoy seeing them too)!
If you're not on Instagram, just leave a comment below telling me your plan.  
I'm dying to hear it!

Also, I have one question for you - 
can you tell me in the comment section below whether or not you would like 
to continue to receive the weekly QAL emails?  I was thinking...all of the info will be in the 
blog posts.  The emails will just be reminders to check out the blog posts.  
So instead of clogging up your inboxes and making one more step for myself I thought 
if you just planned on coming here each Monday morning (or whenever you can each week) 
that might be better for all of us!  But I am happy to do it if you prefer the reminders.  
Vote below with your preference and I'll do what the majority prefers.  Thanks guys!

If this is the first time you've heard about the Stash Hash Quilt-Along it's not too late to join.
HERE'S the Stash Hash QAL Homepage and you can get the pattern HERE.

Happy fabric pulling!

Stash Hash (a new pattern)

Wednesday, June 24, 2020

Good morning friends!
 Today I'd like to introduce to you my new pattern called Stash Hash!


I made the first star back in February 2019!  I had no plan for it.  I just knew I wanted to
make pretty stars to use up scraps.  One star turned into two, then three, then the quarantine 
happened and bam!  I had lots of sewing time on my hands and decided to finish what I started!


I had a blast making each star.  It was fun pulling from my scraps and stash 
to see each different colored star come together.  Scrappy, stars and low volumes are 
some of my favorite things so it was just a delight to make this quilt.


I paired the stars with the alternate blocks that I'm calling "Hashtag" blocks.
I liked the subtle secondary design they create when next to the stars.
(Which you might be able to see better if the background was a solid white.  Scroll down 
to the digital picture of the quilt and squint your eyes.  Do you see a kind-of circular, 
orange peel-type design around the Hashtag Blocks?)


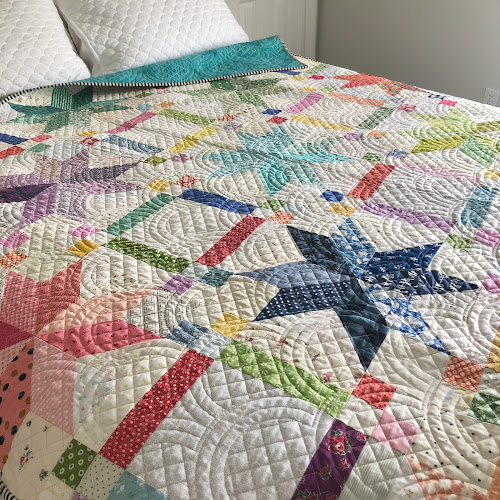
Anyways, this fun quilting design is called Crosshatched Clamshells by Intelligent Quilting.
Cathy Barney in Alpine, UT did the quilting and I just love the way it turned out!
Have I told you how much I absolutely adore crosshatching?
I thought this was a fun, funky spin on crosshatching and it had a little bit of 
a "rainbow" vibe which excited me because of the rainbow colors I used in the quilt. 


One of the best things about this quilt is that I didn't have to buy a single fabric
for it!  I had everything in my stash including this striped binding.
For the back, I just pieced a bunch of aqua and teal remnants together so that felt
great to use up those leftover pieces in my stash!


This pattern comes with instructions for 3 different quilt sizes -
Lap (48 1/2" x 48 1/2")
Throw (64 1/2" x 80 1/2")
Full (80 1/2" x 80 1/2")

It's stash/scrap or precut friendly!
I wrote it to use 1 background fabric but made a note that you
could use lots of low volumes (like I did) for extra scrappiness!
I love the extra scrappy look but it definitely takes more time
 so I wanted to provide the easier option in the pattern.


Stash Hash is now available in my Etsy shop as a PDF (click HERE).
The paper pattern will be available very soon!

And guess what! I am planning a quilt-along for Stash Hash starting in July 
(details coming next week).  I'd love for you to join me as I'm dying to make 
another version asap.  I think I'll be doing a Christmas version.
What colors or fabric line would YOU like to see or make this in?