Showing posts with label Etsy. Show all posts

Welcome Wreath: a 2-Color Quilt

Sunday, July 7, 2024

 Hi there! This past month has been a whirlwind with my nephew's wedding in Montana, kids home from college, and out-of-towners staying with us here and there. It's been fun and I've loved every minute!  But now things are slowing down and I want to share a quilt I finished a little while ago.


Back in May, I had the idea to make my new pattern, Welcome Wreath in a 2-color version.
You can check out the original, colorful version HERE.


I mocked up a few samples of 2-color Welcome Wreath quits and liked them!  So I looked in my stash for a pretty fabric that wasn't too busy but had just the right amount of print on it to be interesting.  I ended up using this pretty, blue-gray floral print for the main fabric and a white solid fabric for the background.


I made the lap-size version this time but Welcome Wreath comes with instructions
for three different quilt sizes - lap, throw, and full.  


It comes together pretty quickly because you use the 4-at-a-time method for making Flying Geese.
Oh, and by the way, I made a video tutorial with Riley Blake Designs for this block!
Use THIS link to check it out!  I shared all of my tips and tricks for getting nice points!


The original version of Welcome Wreath is fat-eighth or fat-quarter friendly 
(depending on which size quilt you make).  

If you'd like to make a 2-color version, you'll need the following fabric amounts:

LAP: 2-1/2 yards for the main fabric and 7/8 yard for the background fabric.
THROW: 4-3/4 yards for the main fabric and 2-1/3 yards for the background fabric.
FULL: 6-1/2 yards for the main fabric and 3-1/4 yards for the background fabric.

Note: The "main fabric" is the blue-gray fabric in my quilt and includes the binding.  
The "background fabric" is the white fabric.


I had my friend Jen Ostler in Highland, Utah long arm quilt this for me using the Goose Down pantograph.  I thought the feather design complemented the timeless look of this quilt.


This quilt is so soft and serene.  It makes me so happy!
I think it would make a really sweet baby quilt.


If you'd like to make this pattern, you can grab the paper pattern HERE or the PDF pattern HERE.


I think 2-color quilts are so classic and vintagy at the same time!
I need more of them in my life.  What about you?  Have YOU made a 2-color quilt?
Let me know in the comments below.

Thanks for stopping by today!
Happy quilting!

Feels Like Home Patterns

Tuesday, May 7, 2024

 Hi!  Did you see my last blog post with my big announcement?  I have a new fabric collection with Riley Blake Designs!  It should be shipping to stores at the beginning of June!


It's called Feels Like Home and it's full of warm browns, deep pinks, navy blue, forest green, teal, and gold.  Plus 10 different low-volume prints.  It's so scrappy and I hope you love it!


Today I want to share more about the 4 new patterns I designed to go along with the collection:
Star Tiles, Welcome Wreath, Feels Like Home, and Family Ties.

First up is Star Tiles:


It's full of itty bitty 4" stars that are framed and set with some simple sashing that creates a fun secondary design.


It comes with instructions for 3 quilt sizes: crib, throw, and queen.
The skill level is "confident beginner".


This is the throw-size quilt and Jen Ostler in Highland, UT quilted it for me with the Plaid Stars panto.
This was a new-to-me panto and I think it's really fun!  


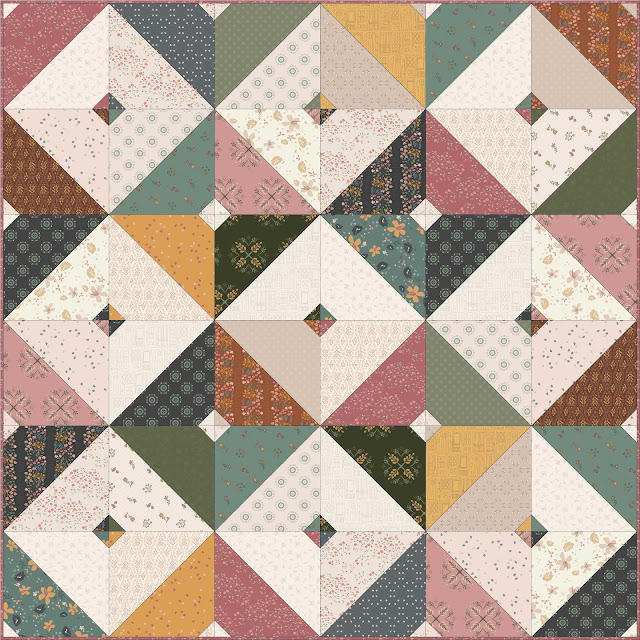
Next up, is Welcome Wreath!


It's a fun Flying-Geese pattern that comes with instructions for 3 different quilt sizes: lap, throw, and full.  I made the throw-size.  The skill level is "confident beginner".


I just love the quilting on this one.  Jen Ostler quilted it with the Lovely Loops panto.  It reminds me of meandering eucalyptus leaves which is perfect for these "wreaths"!


The quilting shows up so well on the back.  I used Riley Blake Confetti Cottons in Chive for this one.


As per usual, Jen quilted a hidden object into the quilting.  Do you see the little house with a heart inside (below)?  Isn't it the cutest!?!  Totally matches the Feels Like Home logo, selvages, etc.!
 

The third pattern I designed is called Feels Like Home.  I haven't made this one yet because I am doing a quilt-along for it this summer!  I'm so excited!  It starts in August and hope you'll join me.  Check out THIS blog post for all the details.


This pattern finishes at 92" x 92".  It's big!  The roof units are paper-pieced and the rest of it is traditionally pieced.  It will be a fun, scrappy make!  The skill level is "intermediate" (I have a video tutorial for the house blocks that will available later this month.)  You can grab the pattern HERE.  You probably don't know this but the first quilt I ever made was a scrappy courthouse steps pattern.  So this is my little homage to my first quilt!

And finally, the last pattern I designed for this fabric collection is called Family Ties.


It's a free pattern on the Riley Blake website.  You can find it HERE.  The skill level is "beginner".


This pattern is so simple and quick to make but I loooove it!  It really shows off the fabrics and quilting!  It uses 5" and 10" Stackers.  I'm kind of dying to make another one soon.


Jen Ostler quilted it with another new-to-me pantograph called Madi Rose.  Jen has such awesome pantos and is so awesome to work with.  She is the best!!!  The tiny heart is the hidden object on that quilt.

Oh, and I added one of my favorite labels from Ever Emblem.  They're so easy to sew into the binding so I don't have an excuse to not label my quilts!  I get the 2" cotton, fold-over, sew-in labels.  If you want to get some for yourself, you will just have to pick one of their basic cotton labels and customize it from there.


Sooo...do you have a favorite of the new patterns I shared today?
I love them all and can't decide!  

For more information about my fabric line, Feels Like Home, you can check out THIS blog post.
To visit my Etsy shop, click HERE.
To receive my newsletter, sign-up HERE.

Thank you for stopping by today and please let me know if you have any questions!
Happy quilting!


Cherish - Alternate Version

Wednesday, April 10, 2024

 Hello, hello!  2 posts in 2 days!  What's up with me?!?
Well, you may remember I posted about my new Cherish quilt pattern back in February.


Well, I made another version of that pattern that I want to share with you!
Since I know applique is not for everyone, I wanted to make a version of this pattern that doesn't have the appliqued scalloped border.  When I was making the original and writing the pattern, I knew it could be cute either way.  I always want to encourage you to think "outside of the box" and make each quilt your own!  If you don't love one aspect of a pattern but love the rest - you can change it!


I purchased this quarter-yard bundle of woven fabrics.  They're so dreamy and soft and I love the texture and colors!  I knew I wanted to use the navy blue fabric for the background so I pulled out a few of the other colors that were similar in value and saved those for another project.  I wanted to make sure I had enough contrast between the background fabric and hearts.


Cherish comes with instructions for 3 different size quilts - lap, throw, and full.
This is the throw-size quilt.


I had my longarm quilter, Jen Ostler quilt it with the Domestic Stitches Squared panto by Leisha Kaye.  I LOVE how it turned out!  I think the geometric pattern goes really well with the modern vibe of these fabrics and colors.  Do you see the "hidden object" Jen quilted into the design (see below)?


I bought some leftover fabric from a friend (who was using the same line of fabrics but in plaids) for the binding.  Don't you think the plaids really pull the whole thing together?


For the back, I debated between a pretty, large-scale floral print in similar colors and this solid pink woven fabric.  You know I love prints, especially floral ones, but in the end, I decided to keep the modern vibe going and get the solid pink.  I think it sweetened the whole thing up.  I'm glad I decided to go "outside of my box" but again, to each their own.  There is no right or wrong here.  What would you have done for the back?


I would describe the skill level for this version of Cherish as "confident beginner".


You can use scraps, your stash, 2-1/2" wide precut strips, fat quarters, or 10" squares for the hearts in Cherish.  I love a versatile pattern!


If you want more details about this pattern or would like to see the original version click HERE.


So, I'm curious, are you a solid or a print person?  I don't use a lot of solids but I am interested in using them more often.  I am definitely a texture person though.  I use a lot of wovens in my quilts!  They make for the softest quilts!


Well, that's it for today!  

If you'd like to grab a Cherish pattern for yourself you can visit my shop HERE.  Be sure to tag me on Instagram or shoot me an email if you decide to make this pattern.  I'd love to see your version!

Happy quilting!

Cherish - A Gigi's Thimble Quilt Pattern

Wednesday, February 21, 2024

Hello friends!  Today I want to introduce to you my new quilt pattern, Cherish.
It's a scrap-friendly pattern that features lots of patchwork hearts and a scalloped border.
There are 3 size options included: lap, throw, and full.


This was my original fabric pull - all from my stash.


The pattern is perfect for using your stash, scraps, or precuts.  
I love simple patchwork; these hearts are so fun to make.


 I would describe the skill level for this pattern as advanced beginner/intermediate.
The hearts are rather simple and surprisingly, the appliqued border is too.


The scallop is a very simple shape that doesn't have points so this is a great pattern to learn the art of applique.  For reference, each scallop took me about 7 minutes to applique. My pattern includes lots of diagrams and tips so I definitely want to encourage you to give it a try if you have never appliqued before.  BUT, if applique isn't your thing, you can totally leave off the scalloped border!  I think it would be just as cute and I plan to make another version soon (without the scalloped border) to show you!

Edit: HERE is the link to the alternate version!

Note: If you want to omit the scalloped border, I would just do the cream inner border and then call it quits. So don't buy the red scalloped border fabric.  And only buy 2-3/4 yards of cream background fabric for the lap-size quilt, 4-1/2 yards for the throw-size quilt, and 5-1/4 yards for the full-size quilt.


I thought this quilt would be beautiful with some custom quilting (mostly because of the scalloped border) so I took it to my friend Linda Childs in Alpine, Utah.

I asked her to do dense crosshatching in the center of the quilt and I am in LOVE!!!


I left her to do whatever she wanted on the borders and I think the design she came up with really enhanced the scallops and feel of this quilt!


I love the red and white plaid binding that was already printed on the bias.  And the pink floral print on the back really gives it that Valentine's Day feel!  The labels are from Ever Emblem.  I've been getting them for years and love them.  So convenient and easy to attach!  I get the 2" cotton, fold-over, sew-in labels.  You'll have to choose a label and customize it from there.  


This was a really fun quilt to make.  If you want to snag a Cherish pattern for yourself, you can grab the paper pattern HERE or the PDF pattern HERE.


Let me know if you have any questions about Cherish or just what you think about this new pattern of mine.  Thank you for stopping by today and happy quilting!

New Quilt Pattern - Merry Pinwheels

Friday, October 27, 2023

 Hi friends!
I'd like to introduce you to my new pattern,
Merry Pinwheels!


I wanted to design a 2-1/2" strip-friendly pattern
and thought these pinwheels were really fun!


Merry Pinwheels would be cute in any colorway.  
But I used this darling Rolie Polie from Riley Blake Designs called
Holiday Cheer by My Mind's Eye. 


It's full of vintagy Christmas goodness!


And bonus, the selvages are so cute!


I believe the skill level for Merry Pinwheels is "confident beginner".


It comes with instructions for FIVE different quilt sizes:
Crib, Throw, Twin, Queen, and King.
This is the twin size.


For the background, I used Sparkler in the color Alpine
by Melissa Mortenson for Riley Blake Designs.

And then I found this darling pink gingham fabric 
for the backing. So vintagy and sweet.


My quilter, Jen Ostler (@drycreekquilter on Instagram) 
quilted it for me.  She used the Orange Peel Swirl Panto.
It was a new-to-me design and I think it's perfect
for this quilt.  It's festive but doesn't take away
from the pattern or prints.


Jen was able to get the design to line up perfectly with the blocks.  I love it.


I bound it with the red stripe from Holiday Cheer.

And of course, I added a simple label from Ever Emblem.
I get the 2" cotton, fold-over, sew-in labels.
If you go to their site, you'll have to pick a cotton label 
and customize it from there.  I've been using their labels for years.  
They're so convenient.  Now I don't have an excuse to not label my quilts!


We're all set for Christmas now.  (I love putting Christmas
quilts on beds during December.  It creates a magical feeling
and gives the added warmth needed in our home here in Utah).


I'll be sharing some of my pattern tester's versions soon.
If you were going to make this quilt what colors/fabrics
would you use?  I'm thinking this would be darling
in 30's reproduction prints.

You can get the PDF pattern HERE
and the paper pattern HERE.
P.S. All patterns and quilts in my Etsy shop
are 20% off right now.

Happy quilting!