Showing posts with label applique. Show all posts

Delma's Dresden Tutorial

Monday, July 7, 2025

I remember my grandma making a Dresden Plate quilt many years ago, and I thought,
I will NEVER make one of those!  I think she worked on those Dresden Plates for years,
and it just seemed so hard and so tedious!  But then I discovered the EZ Dresden Ruler by
Darlene Zimmerman, and it took out all of the guesswork!  I fell in love with Dresdens
and have made several Dresden Plate quilts since then!  

So today, I have a little tutorial for you that features one big Dresden Plate.  This is the
perfect project to showcase some of your favorite fabrics and let you try your hand at a
Dresden Plate, if you haven't made one before.  


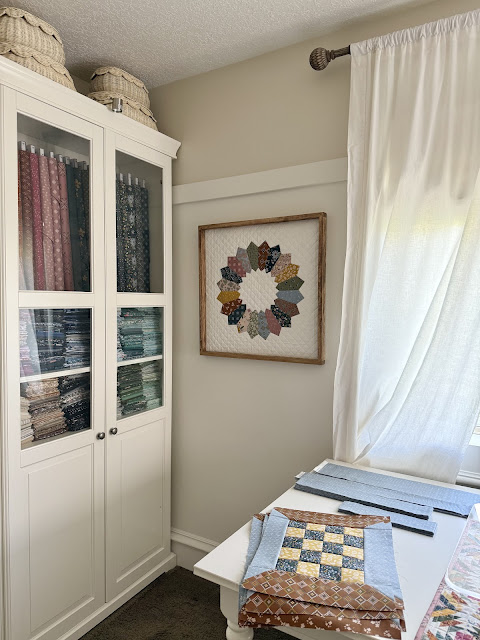
I'm calling this one Delma's Dresden - in honor of my late grandmother.  It's more modern
than the classic ones she used to make, but I've been wanting to make this kind of Dresden Plate
for a long time.  It doesn't have a center circle appliquéd over the smaller edges of the wedges.
I think it's pretty fun with points on the outside and inside of each wedge.

Supplies Needed:

- 20 bright rectangles, 4" x 6" each
- Cream background fabric: 28" x 28"
- Batting: 28" x 28"
- Backing fabric: 28" x 28"
- Binding fabric: 1/3 yard or a 26" x 26" frame
- EZ Dresen Ruler By Darlene Zimmerman
- Wood Point Turner
- Spray Starch 
- Appli-Glue by Jilily Studio
- Basting pins or spray, walking foot, water soluble pen,
and seam guides if machine quilting it yourself
- Other quiltmaking supplies such as a sewing machine, iron and board,
rotary cutter, ruler and mat, coordinating thread and applique needle, etc.

Step 1. Line up the 2" mark of the EZ Dresden Ruler on the bottom edge of a bright 
4" x 6" rectangle and the top edge of the ruler on the top edge of the rectangle.  
Trim off the sides to create a fabric wedge.  Cut 20 wedges.


Step 2: Fold the wedges in half, right sides together.  Sew across the top and bottom edges using a 
1/4" seam allowance (I did this in a chain, which is why they're in an arc, below left).  
Trim the corners near the folded edges to reduce bulk.  Be careful not to clip the stitches.


Step 3: Press the folded edges with a hot iron to mark the center of the wedges.
Turn the wedges right-side-out and use a wood point turner to carefully push out
the top and bottom points so they are nice and sharp.  Align the seam allowances (on the back side)
with the center crease to make sure the points are centered.  Press the "blades" with a hot iron
(use spray starch to get nice crisp edges).  Make 20.


Step 4: Using a 1/4" seam allowance, sew the blades together along the long edges,
right sides together.  Make sure the bigger points are aligned at the top and the smaller points
are aligned at the bottom.  Sew the edges of the first and last blades together to create a
Dresden Plate.  Press the seam allowances in one direction.


Step 5: Press the background fabric in half with a hot iron, in both directions, to mark the
center of the square.  Center your Dresden Plate on the background fabric over the creases.
Use small dots of Appli-Glue underneath the points of the wedges to adhere the Dresden Plate
in place.  I like to work in quarter sections of the Dresden Plate, just lifting up points of the
wedges and putting a few dots of glue on the back side of each.  Once everything
is glued in place, I like to "set it" with a hot iron.  

Note: My Dresden Plate was off-center here, and I didn't notice until I had already glued
it in place.  Thankfully, the background fabric was cut a little oversized, so I had room to
center it later when I squared everything up and cut it down to size.


Step 6. Applique the Dresden Plate to the background fabric.  I hand-appliqued mine using
taupe colored thread.  If you don't like to hand-stich, you could machine appliqué it
with a simple top-stitch or decorative stitch.  Carefully press
the quilt top with a hot iron.


Step 7: Lay down your backing fabric (wrong side up) on a smooth surface.
Then layer with a piece of batting and your quilt top (right side up).  Use basting pins to
secure the 3 layers together, placing pins 3-4 inches apart.


Step 8: Quilt as desired.  I used my walking foot and seam guides to quilt
diagonal lines (both directions) 1" apart.  I like to increase my stitch length a little when I'm
machine quilting so the stitches aren't too tiny and once in a while I had to use a water soluble pen
and a ruler to mark a few of the lines. I used matching cream thread and avoided the
Dresden Plate as I stitched the diagonal lines.  My machine has a button to create a knot so I used that whenever I had to stop or start a new line.  Once I was done with that part, I went back and
stitched in the ditch around the entire Dresden Plate and each blade.  There was lots of starting and stopping as I tried to reduce the amount of overlapped stitching.


Step 9.  Square up the quilt to your desired size.  Then bind or frame it.
If binding it, use 3 strips, 2-1/2" x 40" each.

I trimmed off as little as possible and then my husband built a 26" x 26" frame for it.  
I got 1/4" plywood for the back (Home Depot sells 26" x 26" boards)
and 1" x 2" wood boards for the sides (I believe we used alder).  My husband assembled
the frame and notched out space with a router for the plywood and quilt.  I stained it
and then he attached some simple hardware to the back so we could hang it.
He assembled everything and then he trimmed off any excess quilt that was poking out
behind the plywood with a sharp Exacto knife.


I love how it turned out and am so thankful to my husband for building the frame!
This would be super cute bound like a normal wallhanging or turned into a pillow
if you don't have the means to build a frame. 


Let me know if you decide to make this project!  Even better, you can send me photos at gigisthimble@hotmail.com or tag me on Instagram at @gigis_thimble.  I'd love to see it!
This is a fun way to showcase your favorite fabrics or try your hand at a Dresden Plate,
applique, or machine quilting.  I used strike-off (sample) fabrics from my latest fabric collection
with Riley Blake Designs called Honey Locust.

Thanks for stopping by today and please let me know if you have any questions!

Sprout - A New Pattern

Tuesday, January 10, 2023

 Hello!  Today I want to share
a new pattern I designed called Sprout.


It's a simple applique pattern that uses 10" squares.
It comes with instructions for 3 quilt sizes - 
baby, throw, and queen.  This is the throw size.


I used fabrics from my upcoming fabric line,
Treasured Threads by Poppie Cotton
(which ships to stores at the end of January).
The background fabric is from my line too.
It's a great low-volume grid print called
Good Measure in the color Natural.


The backing is a pink Country Confetti by Poppie Cotton.


The simple custom quilting was done by
Wren Woodland in Highland, Utah.  


Do you applique?
Have you ever wanted to learn?
This is a great pattern to try with!
I share my favorite method -
a freezer paper method to make the templates
and then I hand-appliqued them to the background squares.
However, you could use a different method, if desired.

If you're a quilt shop owner, Sprout
would be a great technique-based class project!


You can snag the Sprout paper pattern HERE
or the Sprout PDF pattern HERE.

I'd love to hear what you think of Sprout.
Are you a fan of applique?  Let me know in the comments!

Cottage Garden Wall Hanging

Sunday, June 30, 2019

I was just looking back through my Instagram feed and realized I started this project in February 2016!?!  Wow.  Three and a half years from the time I started this project to the time I finished and blogged about it.  It was just one of those projects that was great to stuff in my purse and take on the go.  So I would take it on vacation or to soccer games so I could stitch during warm-ups.  I actually finished this several months ago though...just took a while for me to actually get some photos and sit down to blog about it!


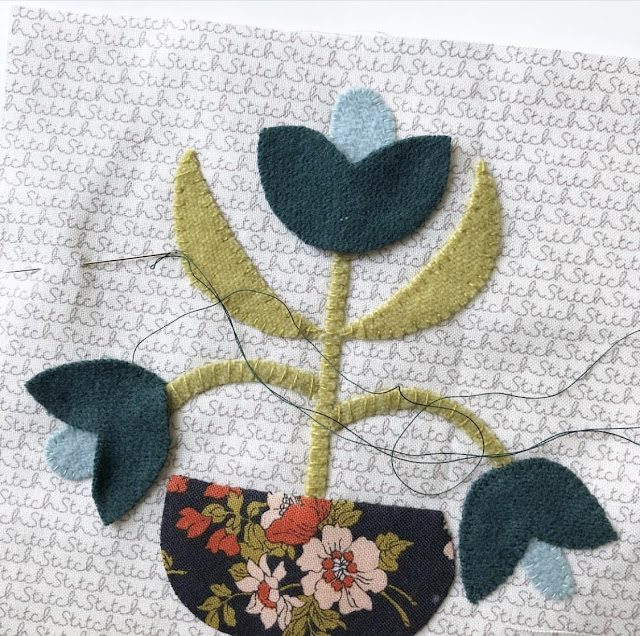
Even though it took forEVER I actually really loved this project.  Wool applique is one of the easiest forms of applique out there and I have a tutorial for it saved in my Instagram Highlights for those of you interested in learning more about it.


I have quite the collection of wool scraps now.  Aren't they pretty?


This pattern is called Cottage Garden by Norma Whaley.  In her pattern, Norma suggested making scrappy 20-Patch blocks but I wanted a little bit more of a traditional look so I decided to switch things up a bit and go neutral.  I felt it kept the focus on the applique blocks.  But either way would be cute don't you think?


The pattern mixes cotton and wool so it's a great stash buster.  
Here are some close-ups of a few of the blocks.  


They're sweet, creative designs with a folk art flair.


I love how the pattern incorporates a traditional signature block in the bottom corner!


I asked Denae Hansen of Plain Jane Quilting in American Fork, Utah to quilt it for me and she did a fantastic job!  I love everything she did, from the cross hatch quilting in the 20-Patch blocks to outlining the applique to the leaves in the border.  It turned out so pretty! 


The only fabric I bought for this was the wool and the inner border fabric, which was purple, totally out of my comfort zone!  Are you a "purple person"?  I feel like you either love it or you hate it.  I normally am not a fan but felt like it complimented the blocks without overpowering them...so I went for it!


Now I just need to find a spot for it in my home.  I love it so much and originally planned to hang it somewhere in my house but if you've been around here for a while you know I don't really love to decorate with quilts anymore, for some reason.  So we'll see what I end up doing with it!


So, have you tried wool applique before?
If so, did you love it as much as I did?
If you haven't tried it yet, I hope I've inspired you to try it!  The possibilities with it are endless!

Have a great day friends!
Amber

Orange Peel Mini Quilt [Finished]

Monday, September 28, 2015

Happy Monday, friends!  It's been a while, eh?  
I haven't posted here since mid-July which is probably my longest break between posts since I started blogging back in 2008!  This blog has been a great way for me to document my quilting journey and I love being able to look back on all the projects I've made over the years!  I also love being able to share my passion for color, print and design with YOU and hope that you've found (and will continue to find) inspiration!  The other day I noticed that several of my latest quilt finishes are not on here so it's time to fix that.  Plan on seeing more posts from me, okay?

One of my favorite finishes from 2014 was my hand-appliqued, machine quilted Orange Peel Mini Quilt.


I posted about the start of this quilt HERE 
with a Freezer Paper Applique Tutorial HERE
but really want to share the finished product with you!!!


This may have been my first play with low-volume fabrics vs. bright fabrics and I looooved it!  I used bright fabrics (that as stand alone fabrics I didn't really love) but as little applique pieces with lots of saturation - were perfect!  And the low-volume background fabrics were a great compliment to them.  They added lots of interest but still fade into the background next to the bright hues of my orange peels.


The straight line quilting was so enjoyable (yet time consuming) to do!
I just followed the edges of my orange peels and quilted lines 1/4" apart in the low volume "diamond" areas.  I don't quilt my projects myself very often but since it finished at 28" x 28" I figured I could handle it.  I love the way it turned out - which is kind of rare for me.  Often times I have a little regret or two but I ended up loving this project and have it hanging in my entryway.


The pattern for this quilt can be found in the book, 
101 Fabulous Small Quilts by That Patchwork Place.

Thank you for coming back to visit after my long blogging hiatus!
See you again soon!

~ Amber

Applique - The Freezer Paper Method

Thursday, July 31, 2014

There are many different methods of applique and they're all good for different reasons.  Today, I'm happy to share with you a quick tutorial on my favorite method of applique ~ The Freezer Paper Method!  This is the method I use 95% of the time and I like it for several different reasons.


Two of the main reasons I prefer this method over other methods 
is because:

1. The template is removed once the applique shape is prepared.
This is nice because there is no paper or other material left inside that needs to somehow be removed or is just left there 
to cause stiffness and bulk.

2. The shape is perfectly prepared before glue basting it in place.
This is nice because (A) you don't have to fiddle with and hope that you're needle turning skills will do the job and keep your shape looking as it should and (B) you can then position the shapes exactly where you want them and don't have to worry about your pieces shifting.

One downside to The Freezer Paper Method, is that it does require some prep work (but I don't really mind - my OCD tendencies like that part!)  Once you get your shapes prepared you are then able to take them with you in the car or or to a soccer game (or wherever!) and you're free to stitch away along the perfectly crisp edges you've already prepared.

So are you ready to try it out?

To get started you will need:


- Freezer Paper (which you can get at most grocery stores.  It is located by the wax paper and foil.)
- Spray Starch (I prefer the Faultless brand that you can get at most grocery stores.  I prefer the Regular Starch with the red lid but my store was out of it last time I checked.)
- a paint brush
- a small bowl or the starch lid
- a pencil
- scissors for paper and fabric
- basting glue (I prefer Appli-Glue by Jillily Studios)
- a pattern
- fabric for the applique shape and the background
- thread that matches the applique piece (I usually use 100% cotton, the Guitermann brand.  Some people prefer silk thread (it's nice too because it practically melts into your fabric but I've heard it's not as durable.)
- an applique needle (I use Milliners Size 11 Large Eye Needles by Richard Hemming & Son).


Step 1: Trace your pattern onto the paper side of freezer paper.


Step 2: Iron the freezer paper on top of two more pieces of freezer paper (paper sides up) to create one sturdy piece of template material.


3. Carefully cut out the shape.


4. Press the shape onto the wrong side of your fabric with paper side up.


5. Cut around the shape leaving a 1/4" - 3/8" seam allowance.


6. Spray a little bit of starch into a small bowl or the starch lid.


7. Use a small paint brush to paint some liquid starch onto the seam allowance.  Just paint a couple inches at a time.


8. Carefully press the seam allowance onto the paper side of the template - wrapping the fabric around the edge of the template (without bumping the template too much where it would bend or distort the shape).  If your shape has a strong curve to it you may want to make some small clips in the seam allowance about 1/2" apart (being careful NOT to clip right up to the template).  My orange leaf (here) has a gentle curve so it was not necessary to clip the seam allowance. Also, if your shape has a crevice (such as at the top of a heart) you will need to clip in there too.


9. Continue to press the seam allowance around the entire template.


10. If you end up with these little dog ears, simply fold the part that is showing back underneath the template and press in place.  Use starch for extra hold.


11. Carefully remove the template and press the applique piece one last time. 

12. Apply small dots of basting glue about 1/4" apart on the seam allowances.


13. Adhere the applique shape onto your background fabric and press with a warm iron to set in place.


14. Thread a thin, sharp needle with coordinating thread.  Make a quilter's knot at the long end.


15. Starting at the backside of your fabric, bring the needle and thread through the background fabric (under your applique shape) and out through the fold of your applique shape.


16. Then take one stitch through the background fabric (starting directly under the point where your needle came out before).  Bring the needle and thread back through the fold of your applique shape about 1/8" away from the first stitch.  Continue taking these stitches around your shape until you get back to your starting point. Tie a knot on the backside of your fabric and you're done!


That's it!  I hope that if you have never tried applique (or don't think you're very good at it) you will try this method.  Practice makes perfect!  And coordinating thread sure helps too!

Happy quilting!
~ Amber