Showing posts with label HST's. Show all posts

Half-Square Triangle Baby Quilts

Wednesday, April 16, 2025

Hi friends!  Today, I have two more really simple baby quilts that I want to share with you!  Last week I shared a simple patchwork quilt.  And this week, I have two Half-Square Triangle quilts that I recently gifted to two new mommas in my neighborhood.  Both had baby girls!  It's such a joy to spread the {quilty} love!

(Sidenote: I finished all 3 of these quilts a few months ago and I'm just now getting around to blogging about them.  Just wanted you to know that I didn't whip all of them up this past week or two. :))


First up is this super simple gingham quilt.  I had some leftover HST's from another project that I didn't end up using, and decided to put them to good use and make a baby quilt with them!  Since it was so simple on the front, I decided to jazz things up a bit with a fun floral on the back.  This quilt was wider than your standard 40" - 42" wide fabric, so I tried to find a wide-back fabric that matched.  Do you know it's really hard to find a cute wide-back!?!  I finally landed on this teal and taupe floral by Lori Holt for Riley Blake Designs.  It was perfect for the look I was going for!


My blocks finished at 6" and I did an 8 x 9 layout, so it finished at about 48" x 54".


Jen Ostler in Highland, Utah, quilted it with the Cartwheel panto, 
which I think added some nice movement to this quilt.


I added one of my usual labels from Ever Emblem that has my name, city, and year on it, plus a fun floral tag that I got from Sarah Hearts.  It looks like she's out of that particular label, but she has so many other cute options, including this one that's pretty similar.  They're all so cute and I think they add a little whimsy to every quilt!


This pattern would be perfect for anyone who loves a simple, cottagey aesthetic!
Or, if you did it in solid fabrics, it would give it a simple, modern aesthetic!

[ I love wrapping gifts with beautiful ribbons that match!]

The second HST quilt I made was this one, which is a bit more colorful!


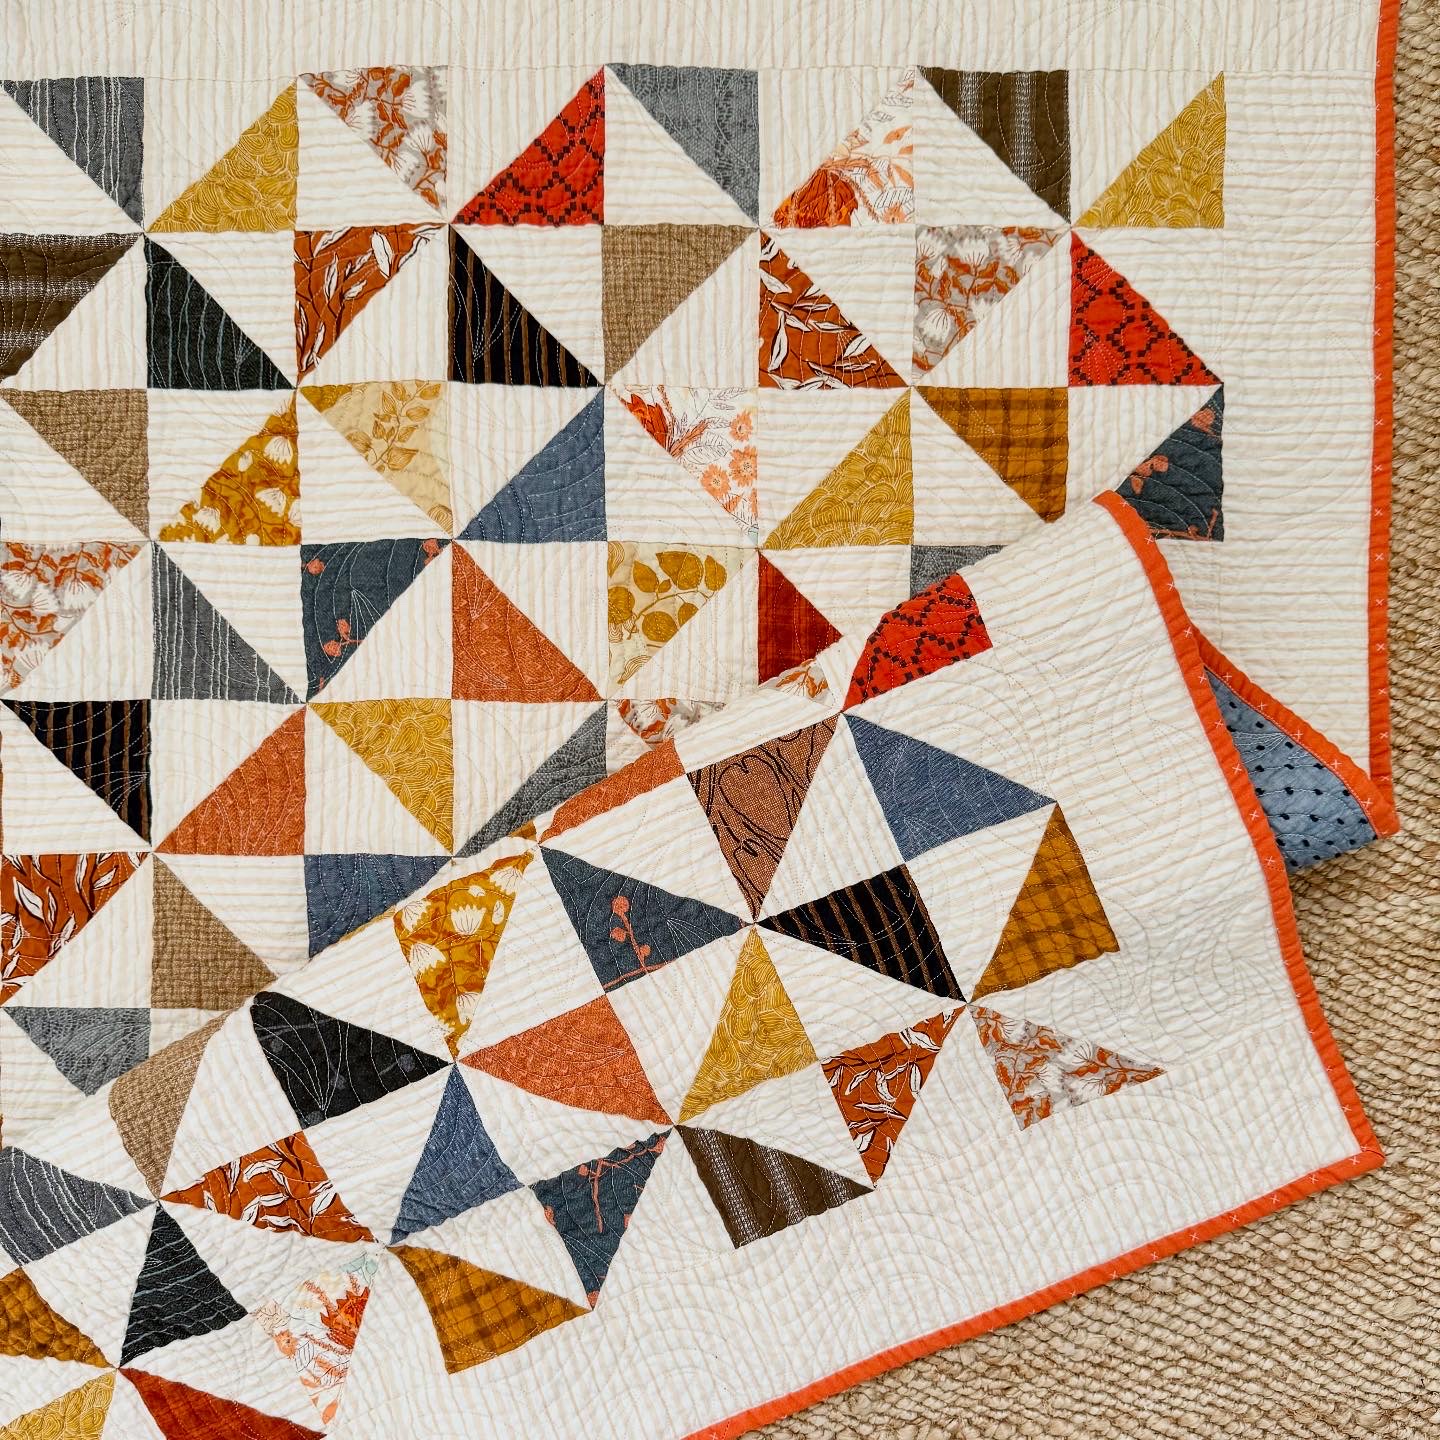
Again, I used some cutoffs from another project to make these HST's.  They have a more earthy color palette but there's plenty of florals in there to make it somewhat girly.


Do you think the days of girly = pink are gone?  I think moms these days are going
a little more modern and thinking outside the box.  Anything goes!


These blocks finish at 3" and I did a 12 x 15 layout.
Then I added a 3" finished border so it finishes at about 42" x 51".


Jen Ostler quilted this one too (she pretty much does all my quilting unless I need custom quilting).
The panto she used is called Golden Curls and I love it!
I think it has a modern, organic vibe, just like my fabrics.


Again, I used a label from Ever Emblem.  They're so handy!
I finished this quilt at the end of last year but didn't get pictures of it until today.
I can't remember what the backing fabric is called but it has a little texture, which I think is fun.


I washed this one before I gifted it.  I don't usually prewash my fabrics but this was a high-contrast quilt so I wanted to make sure the colors didn't bleed.  I threw about 4 Shout Color Catchers
into the wash and had no bleeding!  Yay!


I dropped it off at my neighbor's today.  The mom couldn't talk long (new baby she had to attend to).  But as I was walking back to my house, she called to me from her porch - so shocked that it was a quilt inside the bag.  She thought it was just diapers or something!  I love surprising people with handmade quilts!  Don't you?!?

I hope you found a little inspiration here today!  Use what you have and keep it simple if you want!
Quilts don't have to be intricate.  Cute fabrics and a simple pattern is all you need!  Oh, and be sure to check out my tutorial on how to square up HST's if you're new to quilting!  This will give you perfect points every time!


Happy quilting!

Feeling Patriotic

Wednesday, July 24, 2013

 The 24th of July is considered a state holiday here in Utah.  

It commemorates the entry of Brigham Young and the first group of Mormon Pioneers into the Salt Lake Valley in 1847 where the Latter-Day Saints settled after being forced from Nauvoo, IL.  It's a wonderful place to live and I'm thankful for the great sacrifice those people made so that we can exercise our religious beliefs freely today.

Needless to say, this day has got me feelin' a little patriotic.

Which reminded me that I never showed you my finished Americana 
wall hanging that I first mentioned HERE


In the little quilt group I belong to, we each made and traded several red and beige half square triangles.  We were then suppose to put them together however we wished.  I decided to go the patriotic route and make a wall hanging for my entry way.  


I made a few more HST's on my own, trimmed them all down to 3" using THIS tutorial, sewed them together in rows and then added the blue section up top with the appliqued star.


I quilted it myself (I'm a total beginner so don't look too close).


The blue polka dot, backing/star print and blue check binding fabric were all from my stash.


Framed USA Fabric Art tutorial can be found HERE.
Wooden Flag Blocks tutorial can be found HERE.  
(There are several on the Internet but this one is the closest to what we used).

*I also had an apothecary jar filled with taffy on the right side of my table but my littles kept getting into it and one day dropped the lid.  Fun times :(

Anyways, I hope you all have a wonderful 24th of July, 
no matter what little corner of the world you're in today! 

Happy quilting!
~ Amber 

How-To Square Up Half Square Triangles

Thursday, May 9, 2013

Most of my friends are not quilters but recently one of them decided to make a quilt for a family member.  She chose two fabrics (grey and white solids) and began to make lots of half square triangles (HST's).  She planned to put them together to create a simple, modern chevron quilt.  After she made all of the HST's she started to sew them together in rows.  Everything seemed to be going great until she started to sew the rows together.  Then, she called me in frustration.  We met up and she showed me how the intersections of the HST's were not matching up, her points were either getting cut off or weren't lining up and some blocks seemed to be bigger than others.  She had pulled, pushed and tucked to try to make them all fit but it just wasn't working!  I could see she was very frustrated and discouraged.  We checked her seam allowances and tried to figure out the root of the problem.  While trying to stay positive and remind her that "finished is better than perfection" I could tell she wouldn't be happy until she unpicked her rows and squared up her blocks.  That was the only, yet critical step, she had missed.  So I told her how to square them up and she went home.  She called me a couple days later asking if we could meet up so I could show her (again) how to do it.
 
 
For a newbie quilter like my friend, using rulers for cutting and squaring up can be confusing.  I work in a quilt shop and I see how intimidated people get by it.  Sometimes they'll even bring their blocks in and ask us to square up their blocks for them! :)  

But it really is necessary to take the time to square up.  Squaring up can help you straighten up (so your diagonal seam goes exactly from corner to corner) and it can help you to size up!  Your quilt blocks will be so much easier to put together if they're all the exact same size!  It will take a little extra time but squaring up is totally worth it in the end!

Then I got thinking, there are probably others out there that struggle with the same thing as my friend.  So I've decided to do a little "How-To" on squaring up HST's.  Of course, there are several ways to do it.  This is just the method I like.  Let's begin, shall we?


 First, you'll need a self-healing cutting mat, a rotary cutter and a small ruler that is at least the size of what you want your trimmed size block to be.  I am not one to have a million different size rulers but I've found that my 6 1/2" square ruler works well for most projects.


Decide what size you want to trim all of your blocks to.  As you can see in the above photograph, my HST was about 3 5/8".  I wanted to trim it to an even 3 1/2".  So that doesn't give me much room to square up (only an 1/8").  I only need to trim off a sliver of fabric from each side.


Note: You don't need to pay any attention to the grid marks on your mat.  We're strictly using it as a medium to cut on.  Only pay attention to the marks on the ruler. 

Step 1: Line up the top and right edges of your ruler on the HST.  Make sure your 45 degree line on the ruler is directly over the seam.  You will be trimming both of those two sides first but make sure that the other two sides extend beyond your desired trimmed size (3 1/2" for this example).  If they do not extend beyond the 3 1/2" mark then you will have trimmed off too much and your block will be too small.


 Go ahead and trim the first two sides when you're sure you have the right ruler placement.  Be careful that nothing slips while you're cutting.


Step 2: Rotate the block 180 degrees to the left so that you can trim the other two sides in the same exact way.  This time you can line up the two trimmed sides on your 3 1/2" marks on your ruler.  Also make sure that the 45 degree line on your ruler is directly over the seam.  When everything is straight and lined up, trim off the top and right sides.


Your block should measure exactly 3 1/2" (or whatever you chose to trim yours to).  The dog ears will be cut off and your seam will be a perfect 45 degree line from corner to corner!


That's it.  It's really quite easy peasy.


I think you'll find that although it takes a little extra time to square up...


it's totally worth it and will save you from lots of headaches in the future.

I hope that helps!

Happy quilting!
~ Amber