Plaidish Quilt

Thursday, December 29, 2022

I'm trying to get all caught up on my blogging
before the end of the year (2 days from now)
but I don't think it's going to happen!
I know I have another quilt or two that I still
need to photograph!  

But here's to trying!

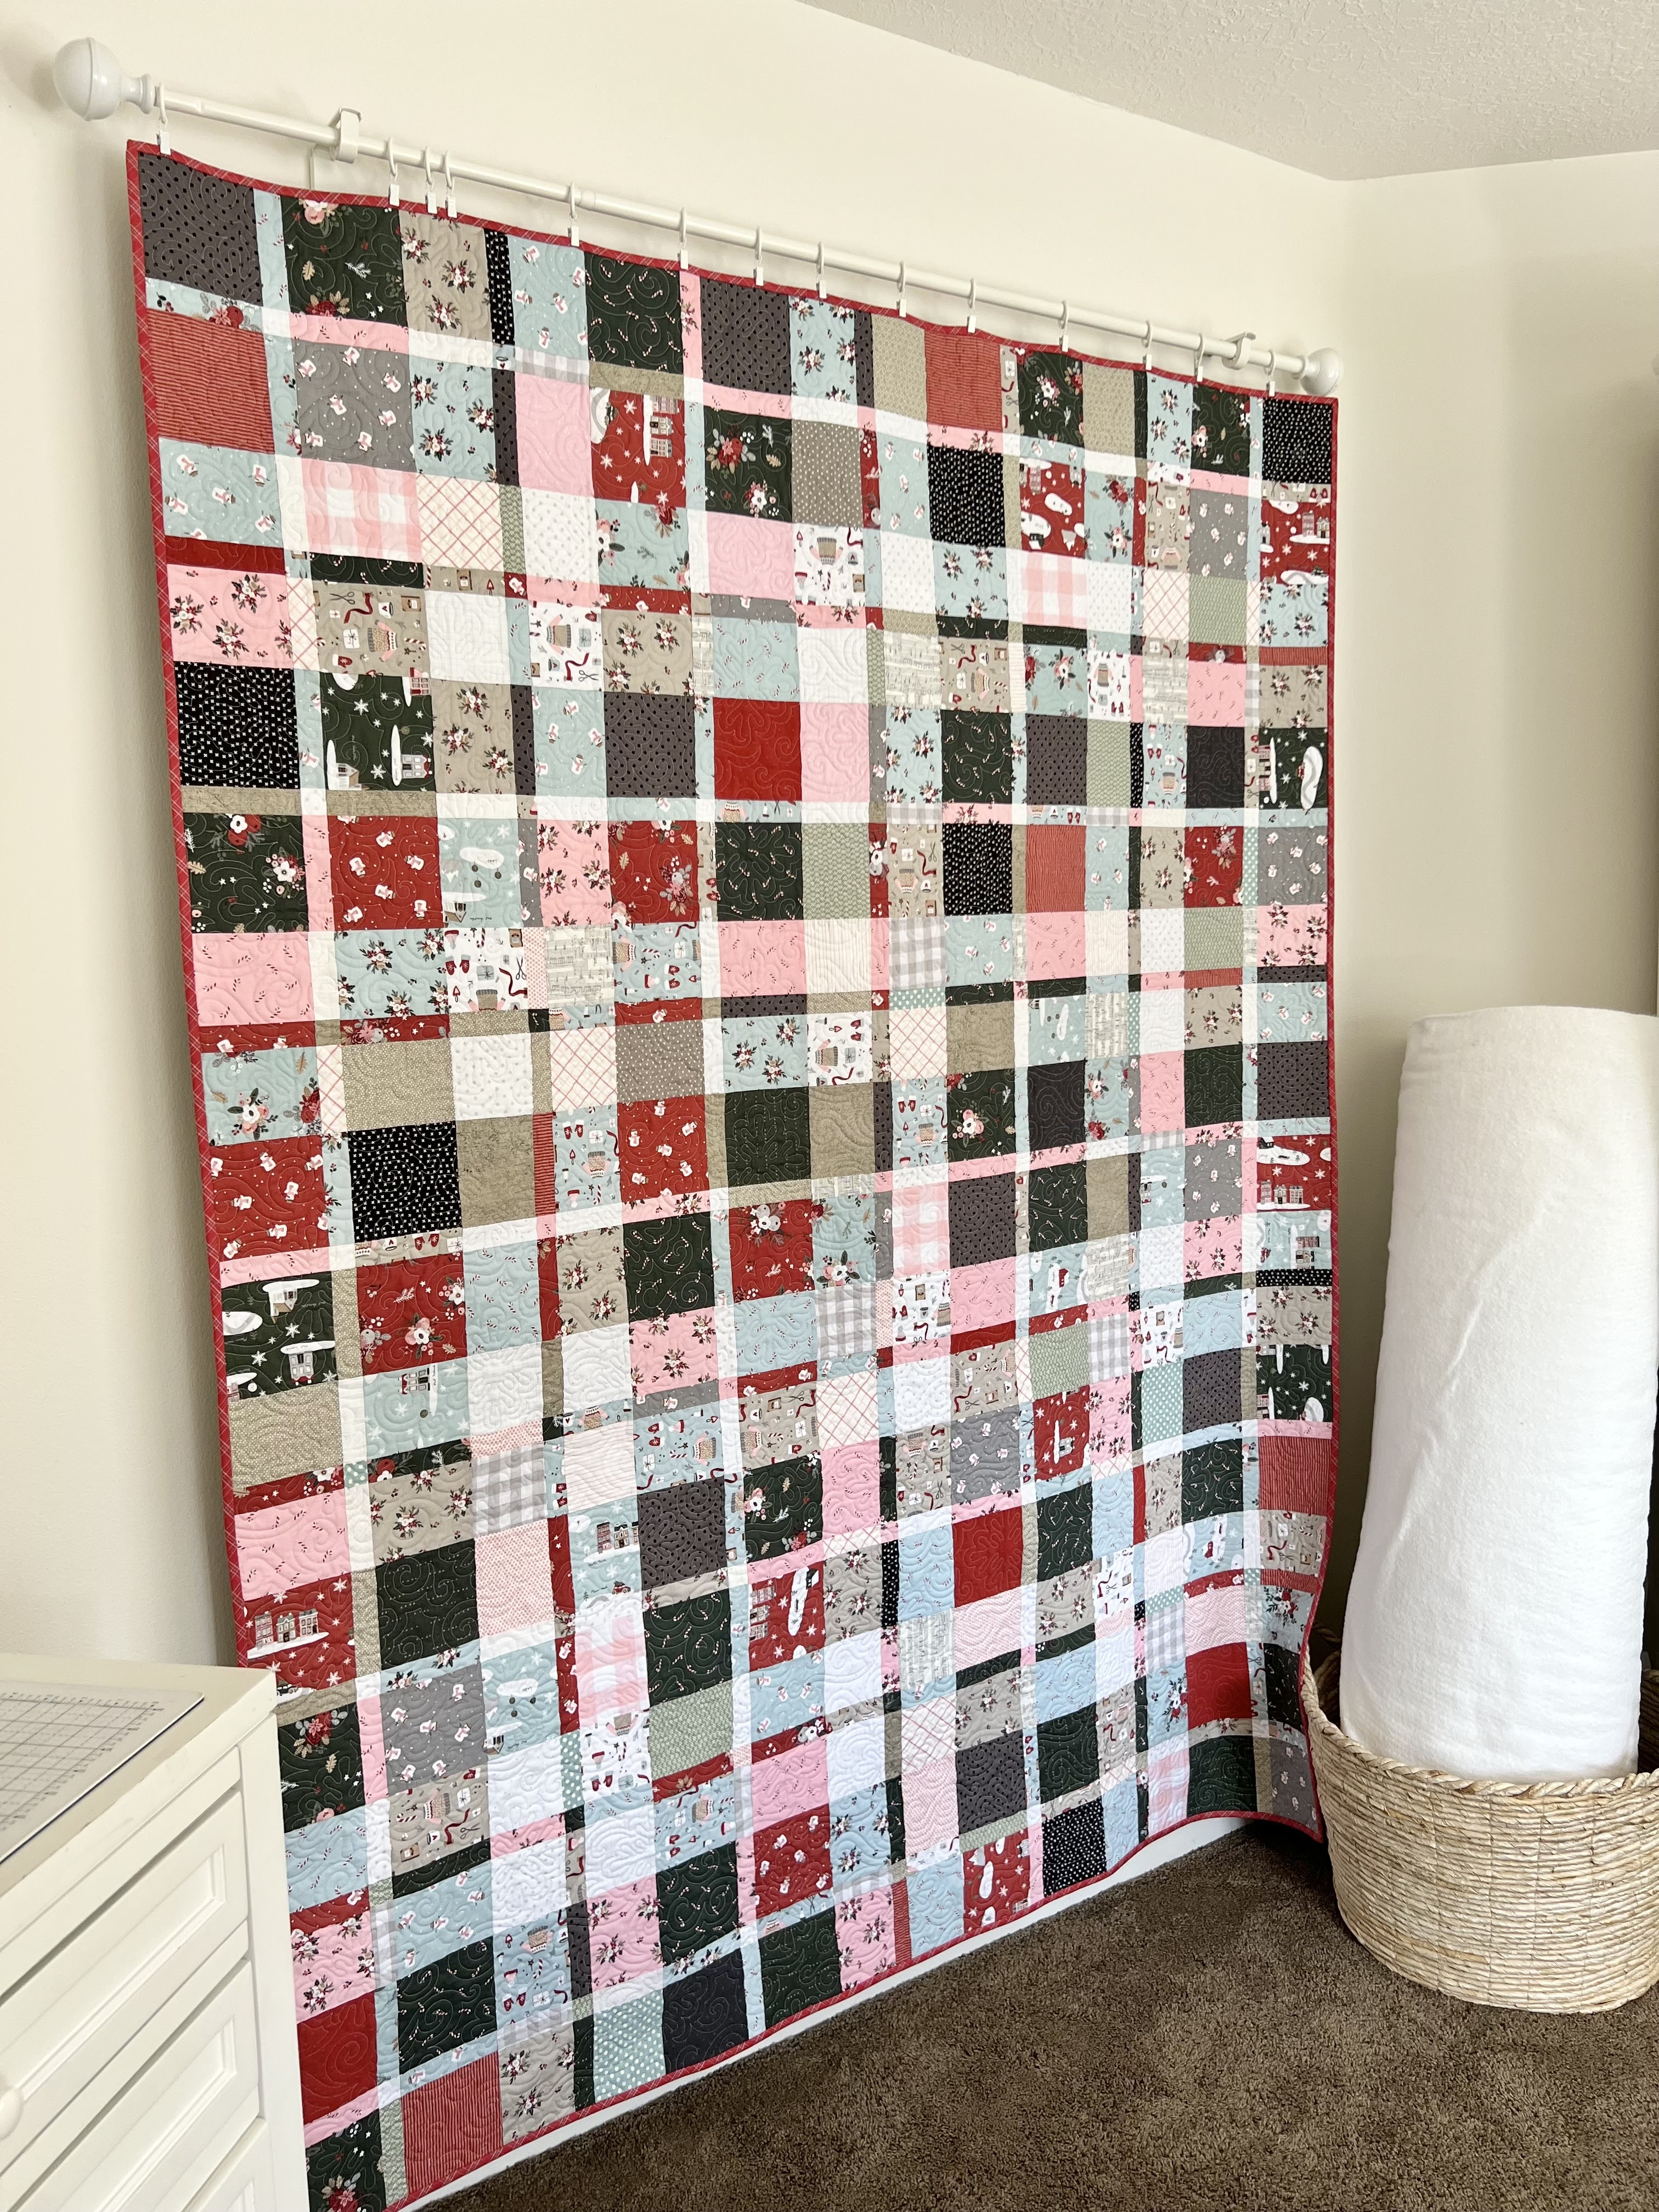
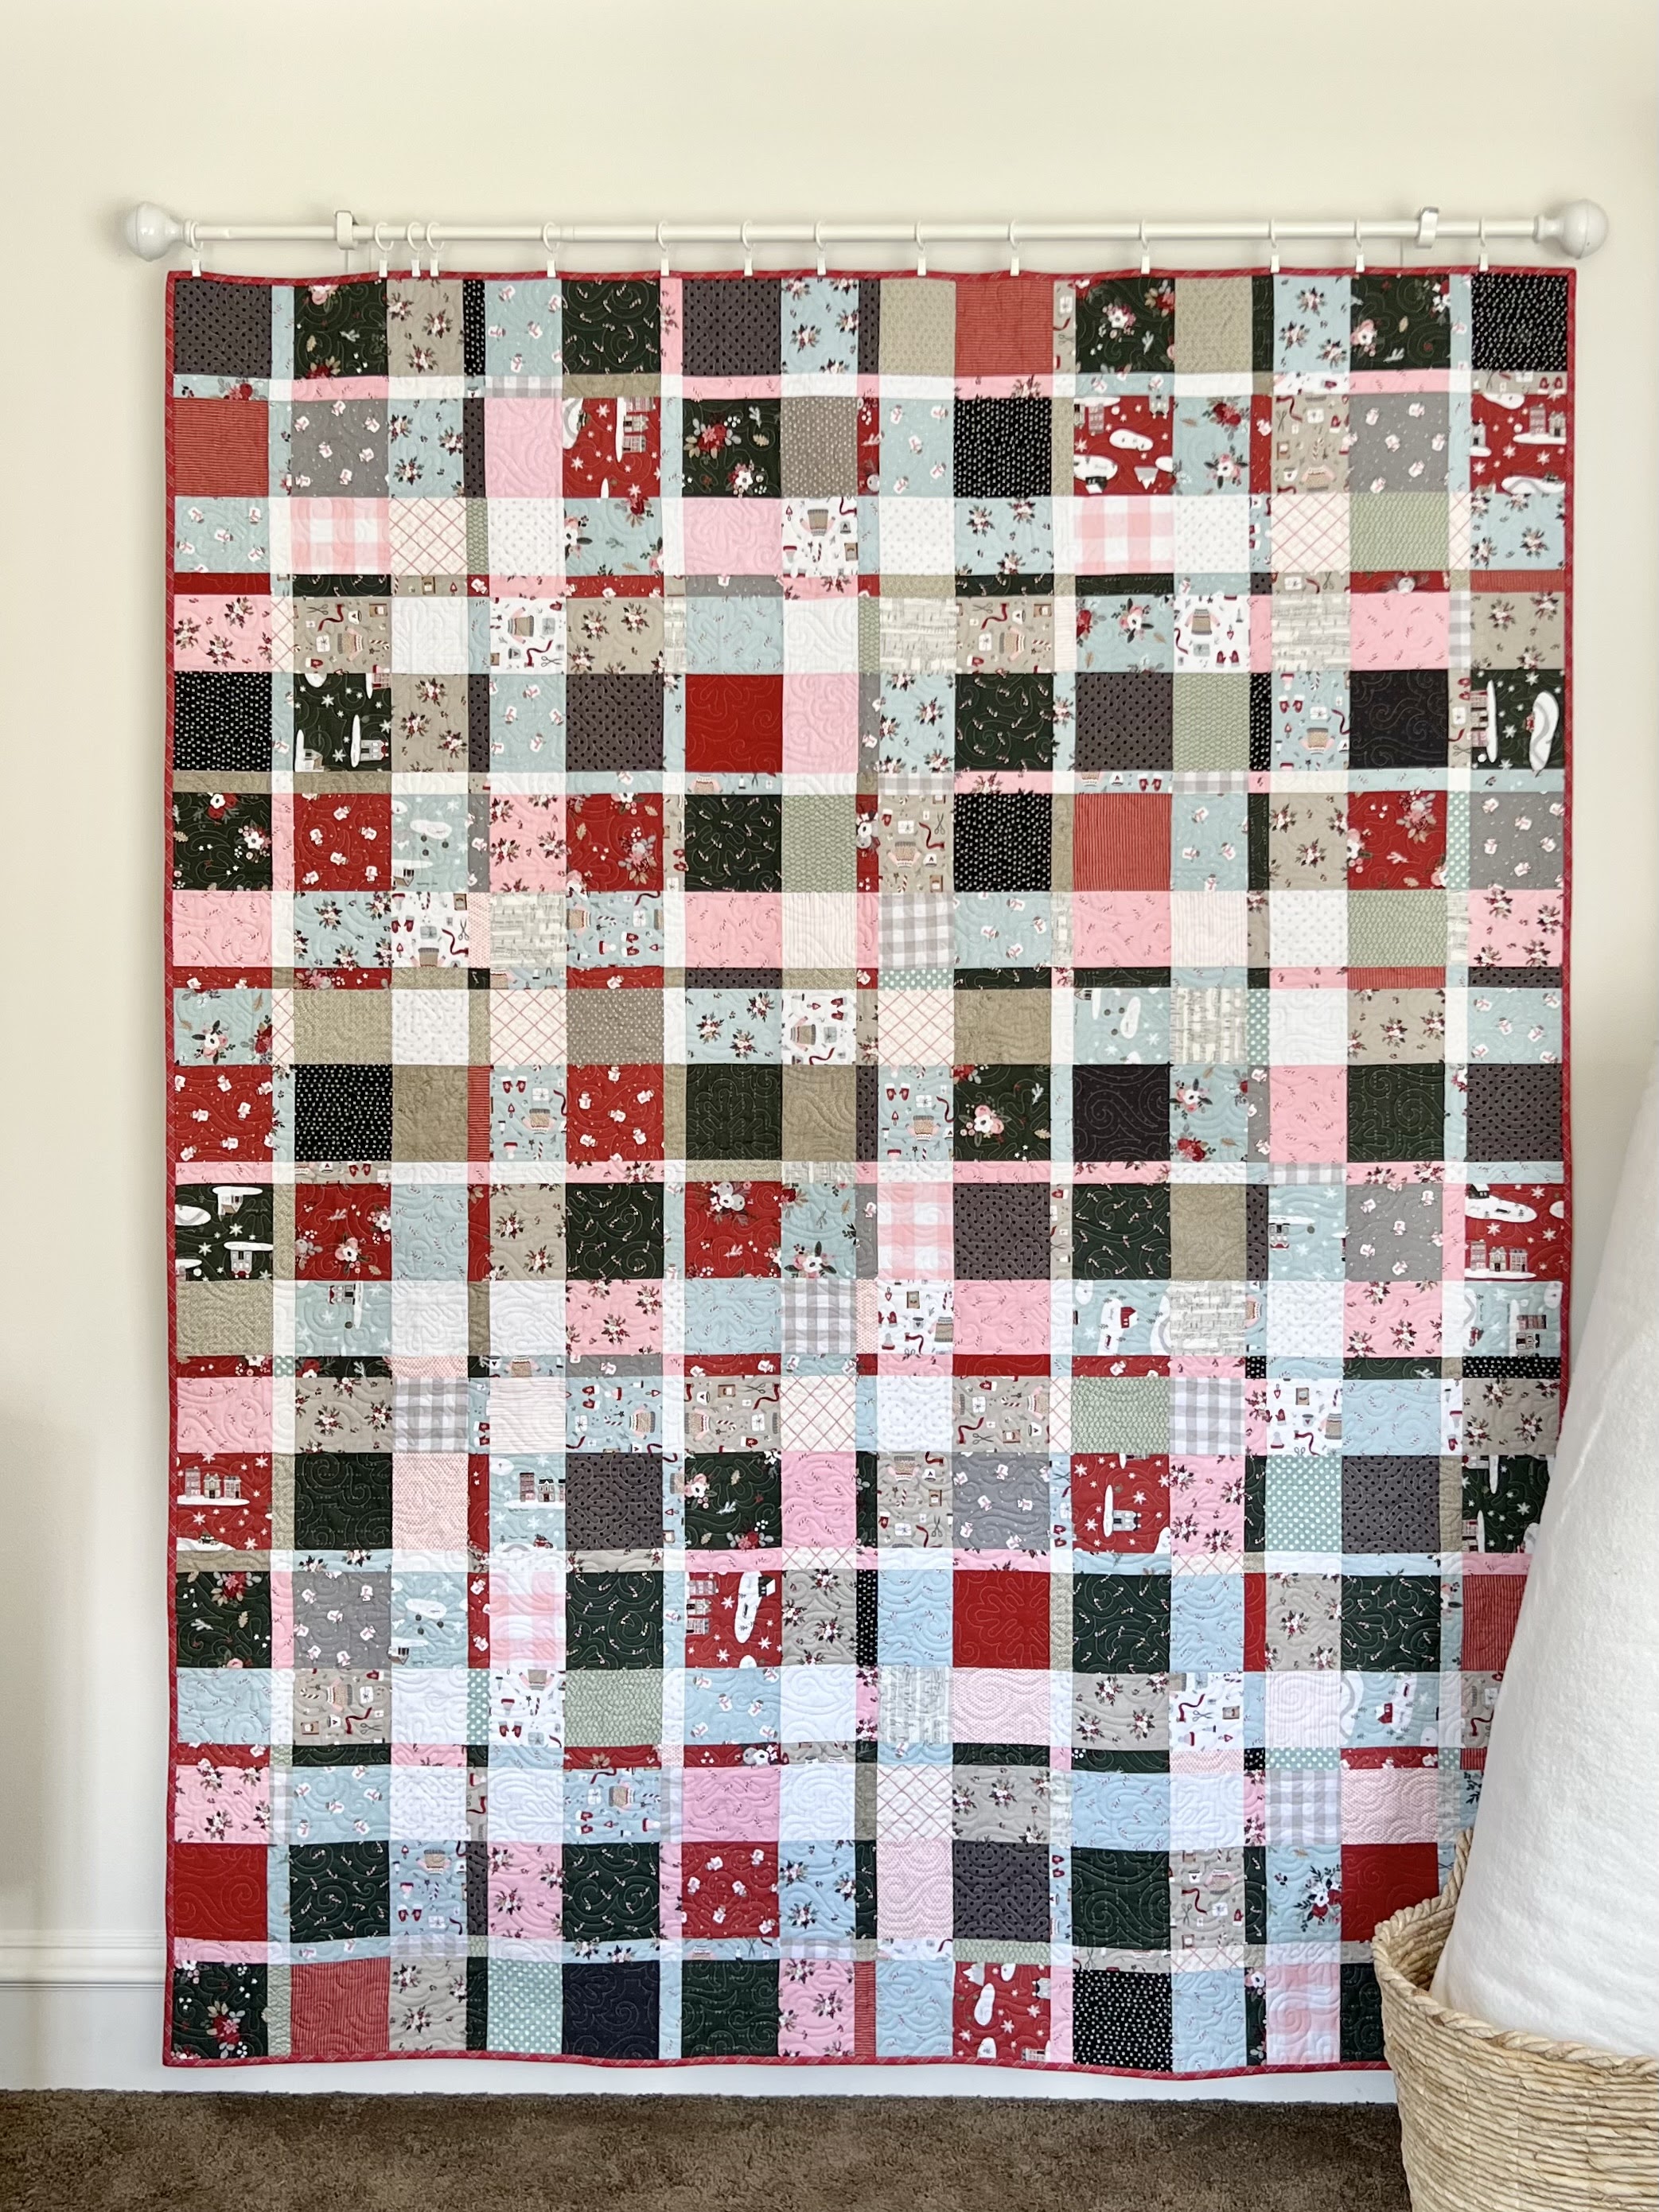
This is my last quilt finish of 2022 -
my Christmas Plaidish quilt!


I actually started it last Christmas.
I was given a fat quarter bundle
from Simply Love Fabrics of this darling fabric line,
Warm Wishes by Simple Simon and Co. for Riley Blake Designs.
Simply Love Fabrics hosted a giveaway for me last year and sent me 
the bundle afterward.  Super generous of them, right!?!


I bought some yardage from them for the back and then
made a couple of blocks before it went into
"project hibernation" for a year.


Then, I went to a 2-day quilting retreat earlier this month and 
spontaneously decided to bring it along.  I ended up working on
it for a day and a half and got the quilt top done.


I threw in several other fabrics from my stash
to add more variety.  I especially love the pink and gray
buffalo check prints but I threw in several others
that fit the color palette, as well.


The dark green floral that I used for the back is
from Warm Wishes, too. I think Minky would've been a nice choice 
for the back, as well, since it's a wintery quilt and Minky is so soft and cozy 
but I didn't think about that until the quilt top was made.
I had already purchased the floral so I just stuck with that.
I think it's a really pretty print though!


I bound it with a red plaid woven fabric
that has white and blue lines on it.

Jen Ostler in Highland, UT quilted it with a panto
called, Swirly Snowflake, which
I think gives it some nice movement.


The pattern is a free tutorial by Erica
of Kitchen Table Quilting, called Plaidish.  It's the perfect
pattern for using up scraps!  Click HERE for the tutorial.


I've had several people on Instagram comment on how
much they like this pattern in these fabrics.
And while I am really happy with the way it turned out,
I will say that this quilt is a little busier than I'm used to.
I also feel like some of my color values
got mixed up along the way.  
The pattern calls for dark, medium, and light fabrics
and I feel like some of the medium fabrics read as lights
and some of the lights read as mediums.
It was a good learning experience though!


I'm pretty happy with the way it turned out overall, though.
I really like the fabrics, colors, and pattern!  
Warm Wishes is a darling fabric line!
And I think when you stand back and look at
the overall quilt, you can really see the "plaid" design.
I would love to make another one someday!

Happy quilting!

Quilt the Rainbow 2023 Challenge

Wednesday, December 28, 2022

Hello!
Today I have a fun announcement to make!
In 2023 I will be hosting a
Quilt the Rainbow Challenge on Instagram!


I hope this will be a win-win situation for both of us!
I'm dying to see your versions of the patterns from my book, Quilt the Rainbow
and this will provide good motivation for you to whittle down your stash
and make some cute quilts!

Here's how the challenge will work:

First, you will need my book, Quilt the Rainbow.
If you don't already own it, I have autographed copies in my ETSY SHOP.  
And for the next two weeks, I have a 20% discount code for the book.
Just use code "2023CHALLENGE" at checkout.


Next, use any of the patterns from Quilt the Rainbow
 to make a quilt top.  It doesn't matter what size you make or what colors you use. 
Most of the patterns are easily customizable.  I can't wait to see your version!


You can make them in just one color of the rainbow
or in multiple colors (like the cover quilt)!

After you make a quilt top, post a picture of it on Instagram
and be sure to tag me @gigis_thimble with the hashtag
#quilttherainbowchallenge.


At the end of each quarter
(March 31st, June 30th, September 30th, and December 31st)
I will hand-select a winner from the hashtag pool that posted during that quarter 
and will announce the winner on Instagram the following day.

**Each unique finished quilt top (or finished quilt) posted on Instagram 
during each quarter of 2023, using one of the patterns from Quilt the Rainbow 
with the hashtag #quilttherainbowchallenge is an entry.** 

* It doesn't matter when the quilt top was made 
as long as it is a pattern from Quilt the Rainbow. 
* You can repost projects in each subsequent quarter
as long as they weren't chosen as a winner in a previous quarter.
* You can enter as many times as you'd like each quarter 
but each entry has to be a different project.  


PRIZES 
(In no particular order):
- 21 Country Confetti Fat Quarters from Poppie Cotton.
- Long-arm quilting by Susan of The Felted Pear.
(Must be a Quilt the Rainbow quilt in the listed pattern size or smaller.
Includes edge-to-edge quilting at medium density.  The quilt maker
needs to cover the shipping and batting charges and the quilt must be mailed
to Susan within 6 months of the announcement.)
- A $125 gift card to Scout Cloth.
(Creative studio-inspired apparel.)
- Gift bundle from Crimson Confection
- 18 Art Gallery Fat Quarters in Rainbow Colors
from Wild Blooms Quilt Co.
- Quilt pattern and ruler from Sew Mariana

There are so many great prizes!
Thanks to everyone who donated!!!
 

That's it!  Easy peasy!
Use Quilt the Rainbow patterns to make quilts
and get the opportunity to win some amazing prizes!
Leave a comment below if you plan on participating or if you have any questions.

Blue and White Pineapple Quilt

Monday, December 26, 2022

I hosted a Pineapple quilt Quilt-Along 
on Instagram that started January 31st, 2022.
We made 1 Pineapple block a week for 36 weeks.  
Today I'm FINALLY sharing my finished quilt!


These blocks finish at 12-3/8" x 12-3/8" and take me
about an hour and a half to make.


Each block has 57 pieces in it.
57 x 36 blocks is 2,052 pieces overall!
The method I used to make the blocks is 
called foundation paper piecing.
I sell packages of the papers in my Etsy shop
which you can check out HERE.


I did an ombre effect on each block;
starting with light blue fabrics in the center and
working my way out to my darkest blues.
The background is all neutral low-volume prints.


I debated on which fabric above
to use for the backing fabric.  I had bolts of both.
I put a poll up on Instagram and an
overwhelming majority voted for the navy plaid.


I cut some of the navy plaid on the bias for the binding.


I had my longarm quilter, Jen Ostler, in Highland, Utah 
do grid quilting on it for a classic, timeless feel.  
I never tire of grid quilting!
She always quilts a small object into the
quilting for a fun game of hide-n-seek.
This time she did a tiny 1" x 2" pineapple.


This is the second Pineapple quilt that I've made.
The first one was pink and green and had
an appliqued border with vines, leaves, and birds.
Click HERE to check it out.
They really are so fun to make once you
get the process down.  I'd love to make another
completely scrappy one someday.


If you have never paper pieced before, this is
a pretty good block to start with because it's the same steps
over and over. It's all strips (no triangles or curves)
and there are not multiple sections you
have to put together.  The Pineapple block
has a lot of bang for its buck since
it looks a lot harder than it really is.


I call my method of foundation paper piecing
a "grab 'n go" method as you don't have to precut
or prepress any of the fabrics.


I would say the skill level for this block is "confident beginner"
and I have created several tutorials to help you
if you decide to make a Pineapple quilt using my papers.
Click HERE for a YouTube tutorial I created for this block.
Click HERE for the printable instructions.
And if you finish making all the blocks
I've got all the quilt finishing instructions HERE.


My quilt finished at about 74" x 74".
It took me about 54 hours to make the blocks,
4.2 hours to remove the papers, 
a few hours to make, attach and hand-stitch the
binding for a total of just over 60 hours.
Kind of crazy but I love it.
It was a true labor of love!

Please let me know if you have any questions
and thank you for stopping by today!
Happy holidays, friend!

Seaside Quilt

Friday, December 23, 2022

 It's Friday, December 23rd, 2022.  
Two days until Christmas.  
This month I've hosted two family parties,
 bought, wrapped, and delivered all the neighbor/friend gifts,
purchased and wrapped a good portion of our family's gifts,
ate my weight in toffee, made two batches of cinnamon rolls,
made two batches of caramels (both of which ended up in the trash, sadly), 
had a girls' night out/favorite things exchange with my besties,
 did two puzzles, and lots, lots more!  It's been a great month overall.


Today, I have been taking it easy even though
I should be out getting a few last-minute gifts
(my husband is on it though, thank goodness!)
I'm "done" and craving some rest.
Writing a little blog post isn't too hard...
So today I want to share with you my finished Seaside quilt!


I made this during the Seaside Quilt-Along I hosted
in September and October.

The pattern is from my book, Quilt the Rainbow.
Here's the original version:

[Photo courtesy of  Martingale Publishing]


Seaside is a great stash buster.  I used up tons of aquas for the background
so all I needed to buy was the solid teal fabric for the accent color.
While I was making the aqua version I also envisioned it
with low-volume fabrics for the background.  I was really excited
to see it come to life during the quilt-along, starting with this fabric pull:


I really love the soft, muted tones of these fabrics!


The quilting was a new-to-me design called Swivel Circles.
I really like it with these earthy fabrics.  Someone even said it reminded
them of seashells which is perfect for the name of the quilt!
Jen Ostler quilted it for me and did a fantastic job, as always!


I bound it with this copper print from Fig Tree's Cinnamon and Cream line
and backed it with Intrinsic Soft from Shine On by Sharon Holland for Art Gallery Fabrics.
I absolutely love that dark green floral fabric!  So pretty!


My labels are from Everemblem.
I get the 2" cotton, fold-over, sew-in labels.
If you go to their site, you'll have to pick a cotton label 
and customize it from there.  I've loved the ease of these labels.
Now I don't have an excuse to not label my quilts!


This is a great project for beginning quilters!


Seaside is such a quick, easy make.
I really see myself making more of these in the future.
I'd love to have one in all the colors!


If you'd like to purchase a copy of Quilt the Rainbow
you can snag an autographed copy from my Etsy shop.
It includes 10 patterns to help you whittle down each
color of your fabric stash + lots more!
Check out THIS post for all the details!

So which version do you like better?
Can you see yourself making Seaside and if so,
what colors would you make it in?

Thank you for stopping by today and happy holidays to you!


Crowning Glory Quilt

Monday, December 12, 2022

 Today I want to share one of my favorite
quilts that I made this year!  I finished it a few months ago
but just recently got some pictures of it.


The pattern is called Crowning Glory and it's in my book,
Quilt the Rainbow, available HERE.  The original one
was made in all yellow fabrics from my stash.

[photo courtesy of  Martingale Publishing]

I really love the yellow one.  But the darker version
just speaks to me!  I love the blues, browns, and creams on the dark gray
background.  Most of the fabrics I used were from the line
Slow Stroll by Fancy That Design House for Moda +
a few other ones thrown in for fun.


The background is so scrumptious!  It's from Diamond Textiles and it's called
Manchester 3187 in the color French Grey.  It's available in lots of colors
and I love them all!  


I don't do dark backgrounds enough.  
I'm hoping to change that in 2023!
I love the texture of this background fabric
(little pluses/x's stitched into the fabric)!


The main block is called Kings Crown and the
sashing unit creates a fun secondary design.


I like to back quilts with large prints when I can.  I ended up
buying a bolt of this blue floral print from Slow Stroll.  I decided 
to bind the quilt in that same print since it pulled together all the colors of the quilt.


The quilting was done by Jen Ostler in Highland, UT.
She always does a fabulous job!
She used the Diamond Loops Pantograph.
It was a new-to-me design and I really love it!
I think it really compliments the design of this quilt.
We did a dark gray thread in hopes that it would blend with
the background fabric.  It's perfect!


I took this quilt on a little outdoor photo shoot and got
lots of fun pictures.  Hope you don't mind me sharing!


This quilt finishes at 65-1/2" x 83-1/2".


It's a great scrap/stash-buster pattern, as are most of the patterns in the book.
If you'd like to check out the rest of the projects in the book
click HERE.  Or you can purchase Quilt the Rainbow from my Etsy shop HERE.

Do you have a go-to background color?
Is there a background color you'd like to use more of?
I'm working on a scrap quilt right now that has a 
light blue background.  I'll share pictures soon!

I'd love to know what you think of this version of 
Crowning Glory!  Thanks for stopping by today!


Sew Delightful Baby Quilt

Hello!  I am trying to finish up some 
blogging before the end of the year.  I have about
5 finished quilts that I want to share with you (so stay tuned). 
Sometimes snapping nice pictures is the hardest part for me!

Today I have a little baby quilt I want to share.


This pattern is called Sew Delightful from my book, 
Quilt the Rainbow.  The original quilt (the red one) is quite large
finishing at 90-1/2" x 90-1/2".


Sew Delightful is easy to make bigger or smaller, square or rectangular.
I made just 4 blocks to make the perfect-size baby quilt!  
This one finishes at about 46" square; not too big or too small.


Sew Delightful is a fat quarter-friendly pattern so
 you probably have lots of fabric in your stash that would
work for this (you might just need some background fabric).
And while the quilts in the book are mostly
monochromatic quilts, I wanted to show you that
they would also be cute in multiple colors!  Blue and green
is one of my favorite color combos for a boy!


The quilting panto is called Abacus Squared - a favorite panto of mine. 
Especially for boy quilts!


Jen Ostler in Highland, UT quilted it for me.
She always hides a little image in the quilting,
this time a little arrow.  Do you see it?


I had all of the fat quarters and background fabric in my stash
so I only had to buy the back and binding fabric!  It feels so good
to use things up!


You can get the book
Quilt the Rainbow in my Etsy shop HERE.


If you make this quilt I would love to see it on Instagram!
Just tag me @gigis_thimble and use the hashtags
#gigisthimblepattern, #quilttherainbowbook, and #sewdelightfulquilt.

Thanks for stopping by!