Showing posts with label scrap buster. Show all posts

Red, White, and Blue Scrapology Quilt

Monday, June 22, 2026

Around Memorial Day of this year, I decided to make a red, white, and blue version of my Scrapology pattern!  It was such a fun, scrappy project that I thoroughly enjoyed making!  It was a great way to kick off summer, all the patriotic holidays, and America's 250th birthday!


Let me tell you the backstory about this pattern.  It was originally in my book, Quilt the Rainbow,
which came out in 2022.  (It was the pink quilt.)  


Unfortunately, my publishing company (Martingale Publishing) went out of business about a year later, so I didn't really have a place to send people who wanted the book.  It was such a bummer because I had a very short window to share about the quilts and patterns!  You can still find the book online in a couple of places but I am not associated with those sellers and, sadly, getting nothing from those sales.  So, I am slowly publishing the patterns from the book as stand-alone patterns.  The good news is that I get to add more size options to the stand-alone patterns, which I am really happy about!


This is the throw size but the pattern now includes twin, queen, and king size options!
It's scrap and fat-quarter friendly now, too!  I love that it's so versatile!


I had everything in my stash to make this quilt except the back.


I ended up buying this sweet cream and light blue plaid fabric for the back.  It's from the fabric line, Tails and Threads for Art Gallery Fabrics.  The label is from Ever Emblem.  I get the 2" cotton, fold-over, sew-in labels.  If you go to their site, you'll have to pick a cotton label and customize it from there.  I've loved the ease of these labels.  Now I don't have an excuse to not label my quilts!


My longarm quilter, Jen Ostler, used the Abacus Squared panto.  She did a great job making the design line up perfectly throughout the X blocks. I just love her, she is the best!


When Quilt the Rainbow came out, my friend, Christopher (the Tattooed Quilter), made Scrapology in Christmas fabrics, which you can see HERE.  Ever since then, I knew I wanted to make it in multiple colors!  In May, I just knew they had to be red, white, and blue!  So thank you, Christopher for the inspiration!  I think this pattern would be cute in any colorway, though!  Can you just imagine it in lots of different colors?  I think that would be so fun...and such a great scrap buster!


And guess what, friends, if you make this quilt, you are going to have some cut-offs - so you can make a bonus project!  I decided to make a decorative pillow for my front porch!  But you could make a little wall hanging, a bag, a quilty-vest, whatever your heart desires!


Scrapology is beginner-friendly and a fun make.
If you would like to grab the pattern or want more info, check out these links:

Click HERE for more details about the pillow.
Click HERE for the Scrapology paper pattern.
Click HERE for the Scrapology PDF pattern.
Click HERE to check out my other red, white, and blue quilts.

Thanks for stopping by today!  I hope you found some inspiration here!

Hanging Fabric Hearts Tutorial

Wednesday, January 21, 2026

Looking for a way to use the scraps of batting you've been saving from past quilt projects?  Or the little pieces of ribbon you've collected over the years because they were just too pretty to throw away?  Do you LOVE fabric and have a bunch of scraps lying around?  If you answered yes to any of these questions, then I have a tutorial for you!


Hanging Fabric Hearts!  They're festive, easy, quick, and fun to make!
Plus, they're a great way to put your scraps to good use!  

I (along with several employees of the quilt shop I work at - Maker's & Co. in American Fork, Utah) made a bunch of hanging hearts to warm up the store for January and February!
We also wanted to show our appreciation to our awesome customers for 
supporting us in the first few months we've been open!


I'll be sharing a simple photo tutorial below or you can go to the end of this post for a printable PDF.

NOTES: 
Use two different pink or two different red fabrics for each heart.  For a pink heart, use
pink thread.  For a red heart, use red thread.  You can get about 8-10 hearts from two 
¼ yard cuts of fabric (less with certain directional fabrics).

To make these Hanging Fabric Hearts, you will need:

- Red and pink fabric scraps (1” bigger than the heart templates)
- Thin batting scraps (1” bigger than the heart templates)
- Coordinating ribbon or lace (optional)
- Red and pink thread + invisible thread or fishing line for hanging
- Frixion pen, straight pins or 505 Temporary Adhesive Spray for Fabric, sewing machine, iron, scalloped pinking shears, needle, and heavy spray starch
- Clear packing tape, push pins, or removable poster mounting putty for hanging 


1. Cut out the paper HEART TEMPLATES.

2. Use a Frixion pen to trace a heart onto the right side of a pink or red piece of fabric.
NOTE: The Frixion pen's ink disappears with heat.


3. Lay a coordinating piece of pink or red fabric on your work surface, right side down.
Then lay a piece of thin batting on top of it.
Then lay the fabric with the traced heart on top of the batting, right side up.

4. Follow the directions on the 505 Temporary Adhesive Spray
or use straight pins to baste the 3 layers together.  I tried it both ways.
I thought pinning worked just fine, but if you find your fabric is puckering or shifting,
you could try pinning more, using the spray, or using a walking foot.
The spray is a little bit messy, so use a plastic bag or cardboard to cover your
workspace if you try it.  It definitely bastes everything together, well!


5. Stitch on the drawn lines around the heart with a simple straight stitch.  (If you’re adding ribbon or lace, center the top edge of the ribbon/lace at the base of the “valley” of the heart.  Start and end your stitches at the bottom edge of the ribbon/lace to secure it in place.  I use a piece that is 3-4 inches wider than my heart.)  Avoid the ribbon/lace when sewing around the heart.


6.  Remove the straight pins, if used.

7. Starch both sides of the heart with spray starch and set with a hot iron.
This will stiffen up the heart so it stays flat while hanging and will remove the traced lines.


8. If using ribbon/lace, tie the two ends into a knot.  Trim as desired.

9. Use scalloped pinking shears to cut out the heart 1/8” away from the stitches.
Be careful to avoid the ribbon/lace.


10. Thread a long piece of invisible thread or fishing line through the heart at the base of the “valley” (through the stitches, right above the ribbon/lace).  Attach the two ends of the thread/fishing line to the ceiling with tape, putty, or stick a push pin into the ceiling and tie a knot around that (that's what we did!)

You could also hang these as a garland on one long piece of ribbon or twine.
I think they would be super cute on a mantle or staircase banister!


We even hung some on the porch outside the shop!


I hope you found some inspiration here today!  Please let me know
if you decide to use this tutorial.


Half-Square Triangle Baby Quilts

Wednesday, April 16, 2025

Hi friends!  Today, I have two more really simple baby quilts that I want to share with you!  Last week I shared a simple patchwork quilt.  And this week, I have two Half-Square Triangle quilts that I recently gifted to two new mommas in my neighborhood.  Both had baby girls!  It's such a joy to spread the {quilty} love!

(Sidenote: I finished all 3 of these quilts a few months ago and I'm just now getting around to blogging about them.  Just wanted you to know that I didn't whip all of them up this past week or two. :))


First up is this super simple gingham quilt.  I had some leftover HST's from another project that I didn't end up using, and decided to put them to good use and make a baby quilt with them!  Since it was so simple on the front, I decided to jazz things up a bit with a fun floral on the back.  This quilt was wider than your standard 40" - 42" wide fabric, so I tried to find a wide-back fabric that matched.  Do you know it's really hard to find a cute wide-back!?!  I finally landed on this teal and taupe floral by Lori Holt for Riley Blake Designs.  It was perfect for the look I was going for!


My blocks finished at 6" and I did an 8 x 9 layout, so it finished at about 48" x 54".


Jen Ostler in Highland, Utah, quilted it with the Cartwheel panto, 
which I think added some nice movement to this quilt.


I added one of my usual labels from Ever Emblem that has my name, city, and year on it, plus a fun floral tag that I got from Sarah Hearts.  It looks like she's out of that particular label, but she has so many other cute options, including this one that's pretty similar.  They're all so cute and I think they add a little whimsy to every quilt!


This pattern would be perfect for anyone who loves a simple, cottagey aesthetic!
Or, if you did it in solid fabrics, it would give it a simple, modern aesthetic!

[ I love wrapping gifts with beautiful ribbons that match!]

The second HST quilt I made was this one, which is a bit more colorful!


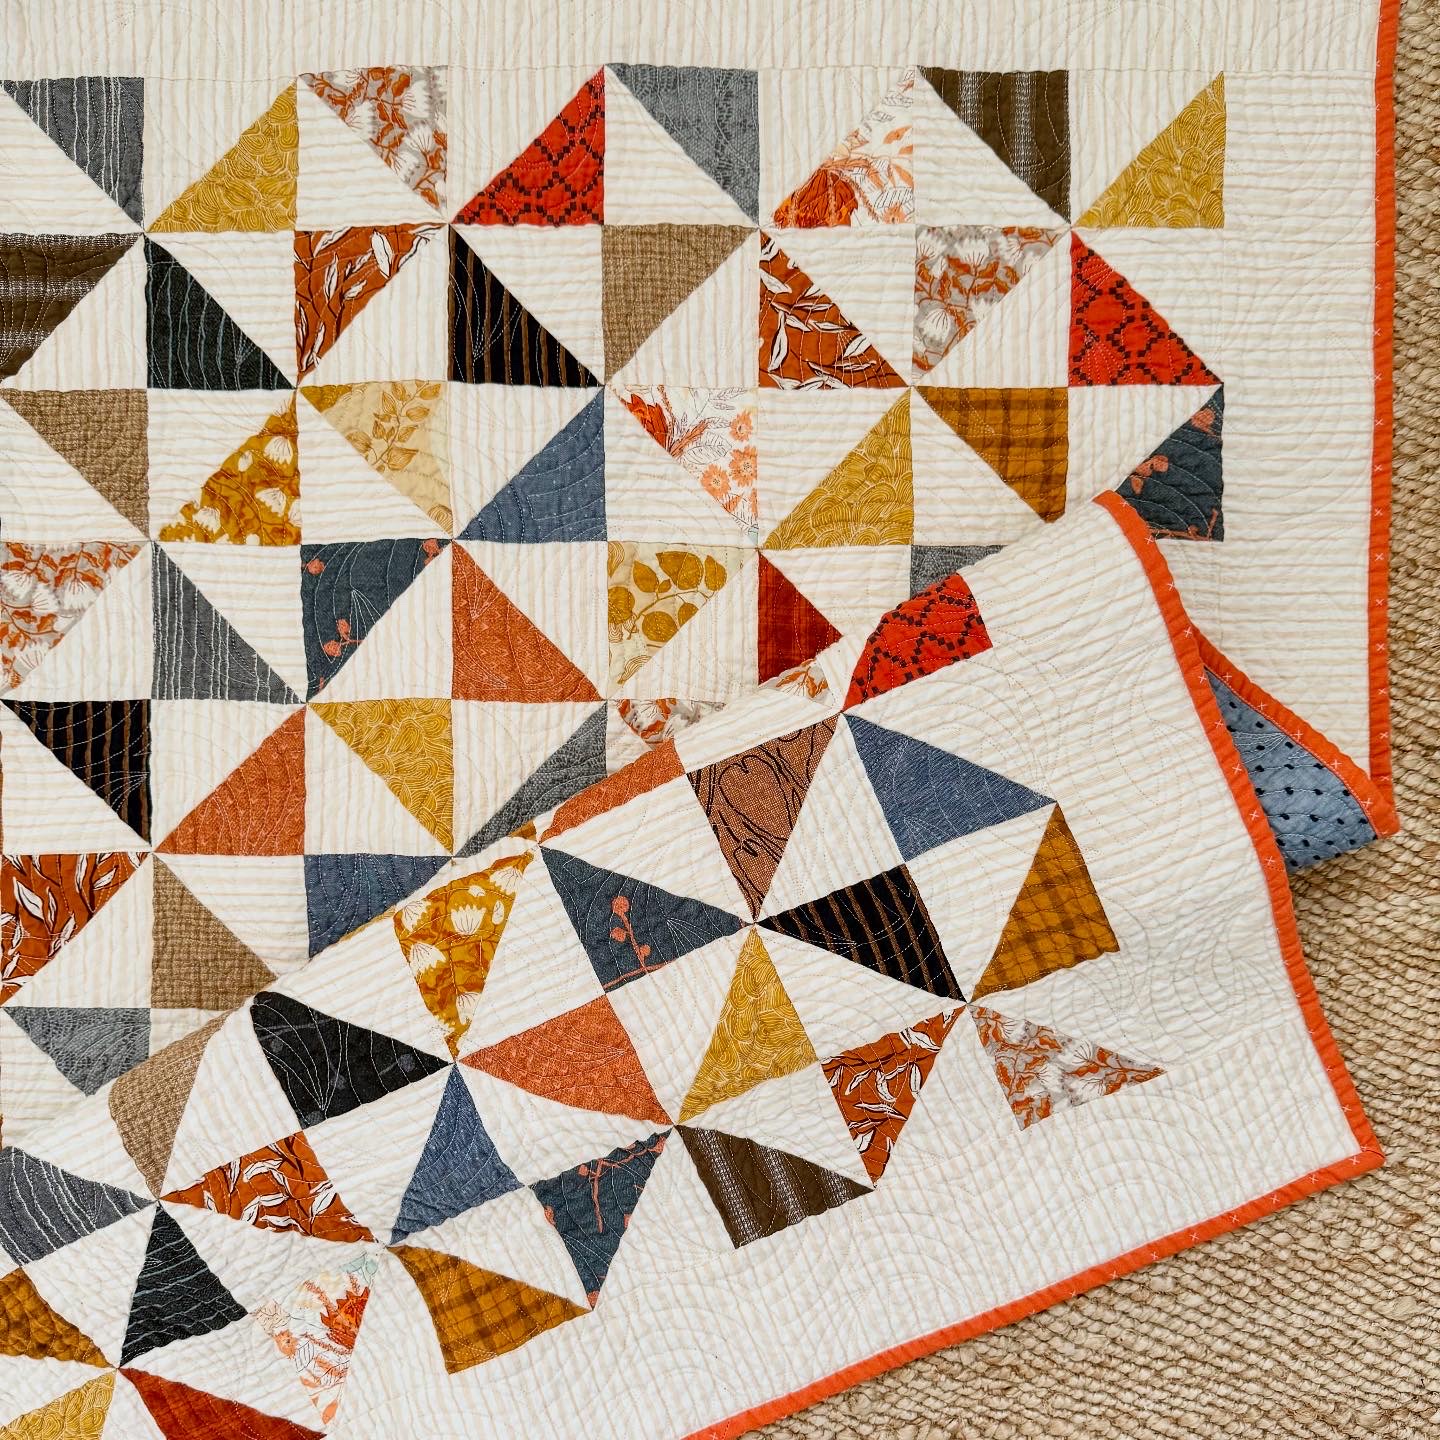
Again, I used some cutoffs from another project to make these HST's.  They have a more earthy color palette but there's plenty of florals in there to make it somewhat girly.


Do you think the days of girly = pink are gone?  I think moms these days are going
a little more modern and thinking outside the box.  Anything goes!


These blocks finish at 3" and I did a 12 x 15 layout.
Then I added a 3" finished border so it finishes at about 42" x 51".


Jen Ostler quilted this one too (she pretty much does all my quilting unless I need custom quilting).
The panto she used is called Golden Curls and I love it!
I think it has a modern, organic vibe, just like my fabrics.


Again, I used a label from Ever Emblem.  They're so handy!
I finished this quilt at the end of last year but didn't get pictures of it until today.
I can't remember what the backing fabric is called but it has a little texture, which I think is fun.


I washed this one before I gifted it.  I don't usually prewash my fabrics but this was a high-contrast quilt so I wanted to make sure the colors didn't bleed.  I threw about 4 Shout Color Catchers
into the wash and had no bleeding!  Yay!


I dropped it off at my neighbor's today.  The mom couldn't talk long (new baby she had to attend to).  But as I was walking back to my house, she called to me from her porch - so shocked that it was a quilt inside the bag.  She thought it was just diapers or something!  I love surprising people with handmade quilts!  Don't you?!?

I hope you found a little inspiration here today!  Use what you have and keep it simple if you want!
Quilts don't have to be intricate.  Cute fabrics and a simple pattern is all you need!  Oh, and be sure to check out my tutorial on how to square up HST's if you're new to quilting!  This will give you perfect points every time!


Happy quilting!

Simple Blue and White Patchwork Quilt

Friday, April 11, 2025

Who said a quilt has to be intricate or time-consuming to make!?

Not me!  I love simple patchwork!
I had some blues leftover from a few projects recently
so I decided to cut them into 3 1/2" squares for a simple lap-size quilt. 


I did a 17 x 21 block layout, so this quilt finished at 51" x 63".
I think it would be perfect for a little boy.


Jen Ostler in Highland, UT. quilted it for me with this panto called Ripple.  I've used that panto before and think it adds some nice movement to a very "square" quilt.  I like that it's a play off the blues/water, too!  Do you see the little star (below) that Jen quilted into it?  Such a fun, signature move that she does on all of her quilts.  Makes for a fun game of hide and seek.


The label is from Ever Emblem. I've been getting labels from them for years!  I get the 2" cotton, fold-over, sew-in labels.  If you want to get some for yourself, you will just have to pick one of their basic cotton labels and customize it from there.  I machine stitch my binding down around it because it's hard to hand stitch through it (but then I usually hand stitch the rest of my binding down to the back of my quilt).


I had a partial bolt of this cream and navy plaid fabric in my stash.  It felt good to use some of it in the patchwork and for the back of the quilt.  I don't think I've used a plaid for an alternate/background fabric before, but I thought it was kind of fun in this particular project.  Since everything is going the same direction (as in, there aren't any triangles that would cause the plaid to be on-point in some places) it was definitely a good project for that!  I had someone ask me if it was hard to get all of the lines straight and I honestly didn't even pay attention to that.  I just cut it like I normally would.  It's generally pretty straight but I think a little imperfection adds some charm!  Would it bug you if the plaid wasn't perfectly straight?


I hope this inspires you to go simple and not worry about perfection!


Happy quilting friends!

Dawn's Delight Quilt

Friday, August 16, 2024

 Hello!  Today I am sharing a recent quilt finish that I made just for fun!


But first I want to share with you the inspiration behind this project.  This color palette was inspired by someone I follow on Instagram named Jerina (her Instagram handle is @quiet.sanctuary).  She is a beautiful soul who shares her heart in every post!  She shares her love of crochet, quilts, antiques, family and sourdough bread!  Plus, she is an amazing photographer and writer.


[The above photo is shared with permission from Jerina @quiet.sanctuary.]

I think the above photo might be the exact photo that stopped me in my Instagram scroll one day.  I love the crocheted blanket Jerina made.  Oh how I wish I could crochet!!!  I also loved the cozy, moody, yet sweet colors that Jerina used!  The faded and worn look that she captured in that photo was so soothing to my soul!  One morning I woke up and couldn't stop thinking about her blanket so I went to my sewing room and started playing around - trying to achieve that same look with fabric.


Around that same time, I had also been eyeing the classic Rail Fence/Roman Stripes quilt pattern.


So I decided to "kill two birds with one stone" and combine that pattern with those colors.
I cut some 2" x 5" rectangles and got to work.

Each block was made with three 2" x 5" cut rectangles so the blocks finished at 4.5" x 4.5".
I did a 13 x 15 block layout so my quilt finished at 59" x 68".  This pattern is a great way to use up scraps and is beginner-friendly!  


I love to reward myself with these kinds of projects once in a while.  It's good for my creative juices to do some mindless, just-for-fun sewing!  Plus, I just love a good scrappy, classic quilt pattern!


I used my stash and scraps for the quilt top but did end up buying the back and binding fabric.


The longarm quilting was done by my friend Jen Ostler in Highland, UT.  We decided on a pantograph called Moon Phases.  I had never used that one before but I felt like it matched the vibe of this quilt!


I wanted to name this quilt something other than Rail Fence or Roman Stripes because:
 A.) It didn't feel like a typical Rail Fence quilt (because the fabrics weren't making a secondary zig-zag design).  And B.) I just don't like the name Roman Stripes!

So I asked my Instagram followers if they could help me name my quilt!  I got tons of great suggestions but I finally landed on "Dawn's Delight".  It seemed to fit my color scheme, the quilting panto, and the pattern well.  The way the blocks are rotated just seems fun and well, delightful!  So thank you Janet (@janlynnsquilts on Instagram) for the name suggestion!


I took so many pictures...but I will share just one last one.


This was a fun project and I highly recommend making one of these quilts.
I plan to wash this soon so it will crinkle up and get even cozier!

Thanks for stopping by today!